Recently, we’ve seen many Windows 11 users complaining that File Explorer starts crashing randomly, or becomes unresponsive. If you happen to run into the exact same issue, don’t worry! You’ve come to the right place. This article lists the latest fixes that will definitely help you resolve this issue.
Try these fixes
- Restart Windows Explorer
- Check for Windows updates
- Run System File Checker and DISM tool
- Uninstall a recent update
- Adjust File Explorer Options
Restart Windows Explorer
Sometimes, you just need to restart File Explorer to get it back to the normal state. To restart File Explorer, follow the steps below:
- On your keyboard, press Ctrl, Shift and Esc at the same time to open Task Manager.
- Under the Processes tab, select Windows Explorer and click Restart.
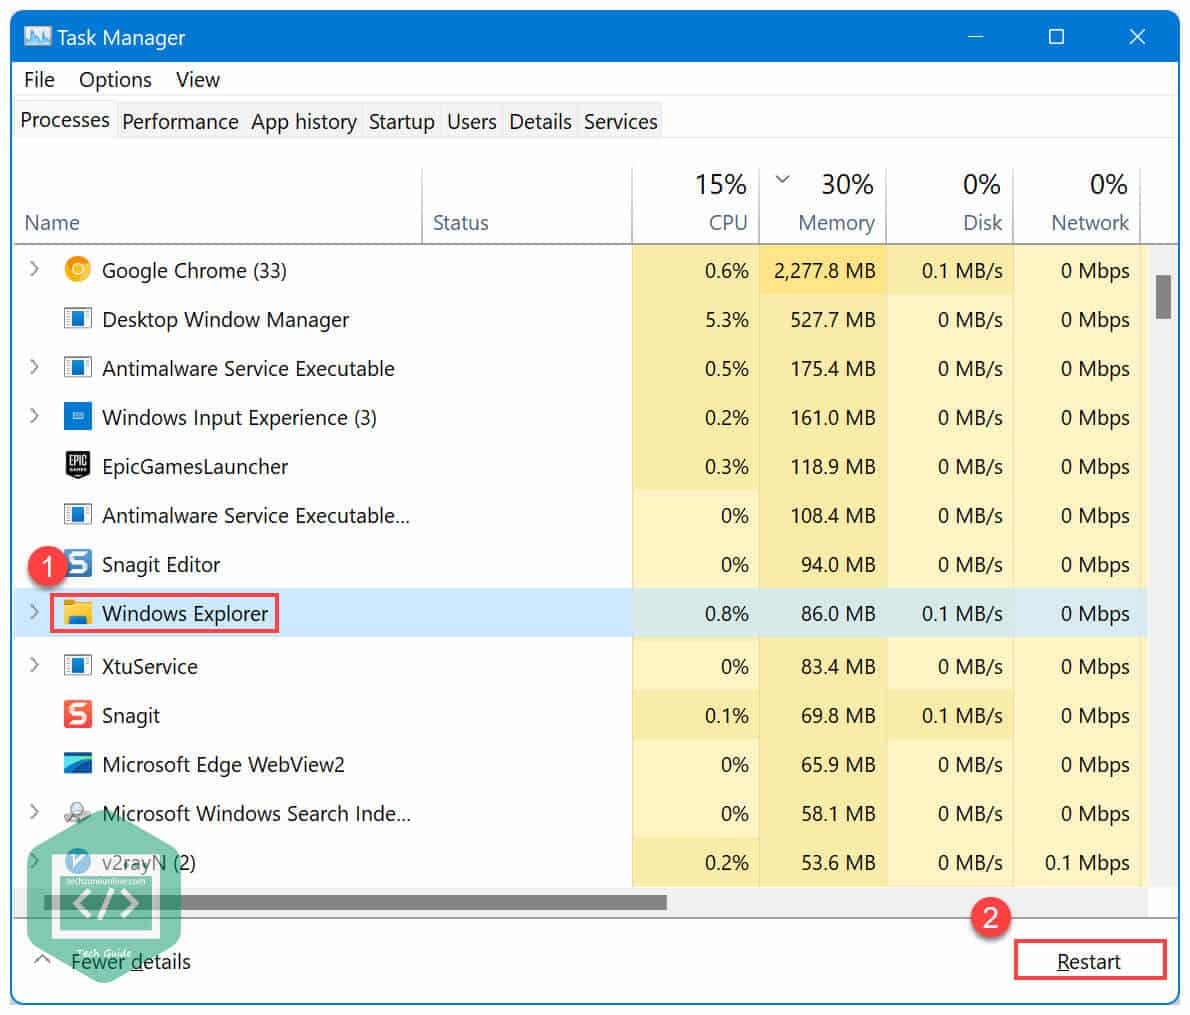
See if File Explorer works again. If this fix didn’t work for you, try the next fix, below.
Check for Windows updates
Microsoft constantly releases Windows updates to fix bugs, add new features and enhance performance. Maybe there is a bug in the current build of Windows 11 that cause File Explorer to stop working, and a Windows update is required to fix this issue.
If restarting File Explorer didn’t fix this issue, you can follow the steps below to check for Windows updates:
- On your keyboard, press the Windows logo key and I at the same time to open the Windows Settings.
- Click Windows Update in the left panel, then click Check for updates to see if Microsoft releases new Windows updates.

If there are new Windows updates available, let Windows download and install the latest udpates. See if this issue persists after you installed the latest Windows updates.
If Windows tells you that you’re up to date after you clicked the Check for updates button, try the next fix, below.
Run System File Checker and DISM tool
This issue may occur when there are some important system files corrupted. If you are not sure whether there is any system file corruption or not, you just need to run System File Checker (SFC). By Running SFC, you can fix any system file corruption from the the resident component store.
To run SFC, follow the steps below:
- On your keyboard, press the Windows logo key and R at the same time. Type
cmdand press Shift, Ctrl and Enter at the same time to invoke an elevated CMD. - In the CMD window, execute the following command:
sfc /scannow
Note: this command doesn’t require Internet access.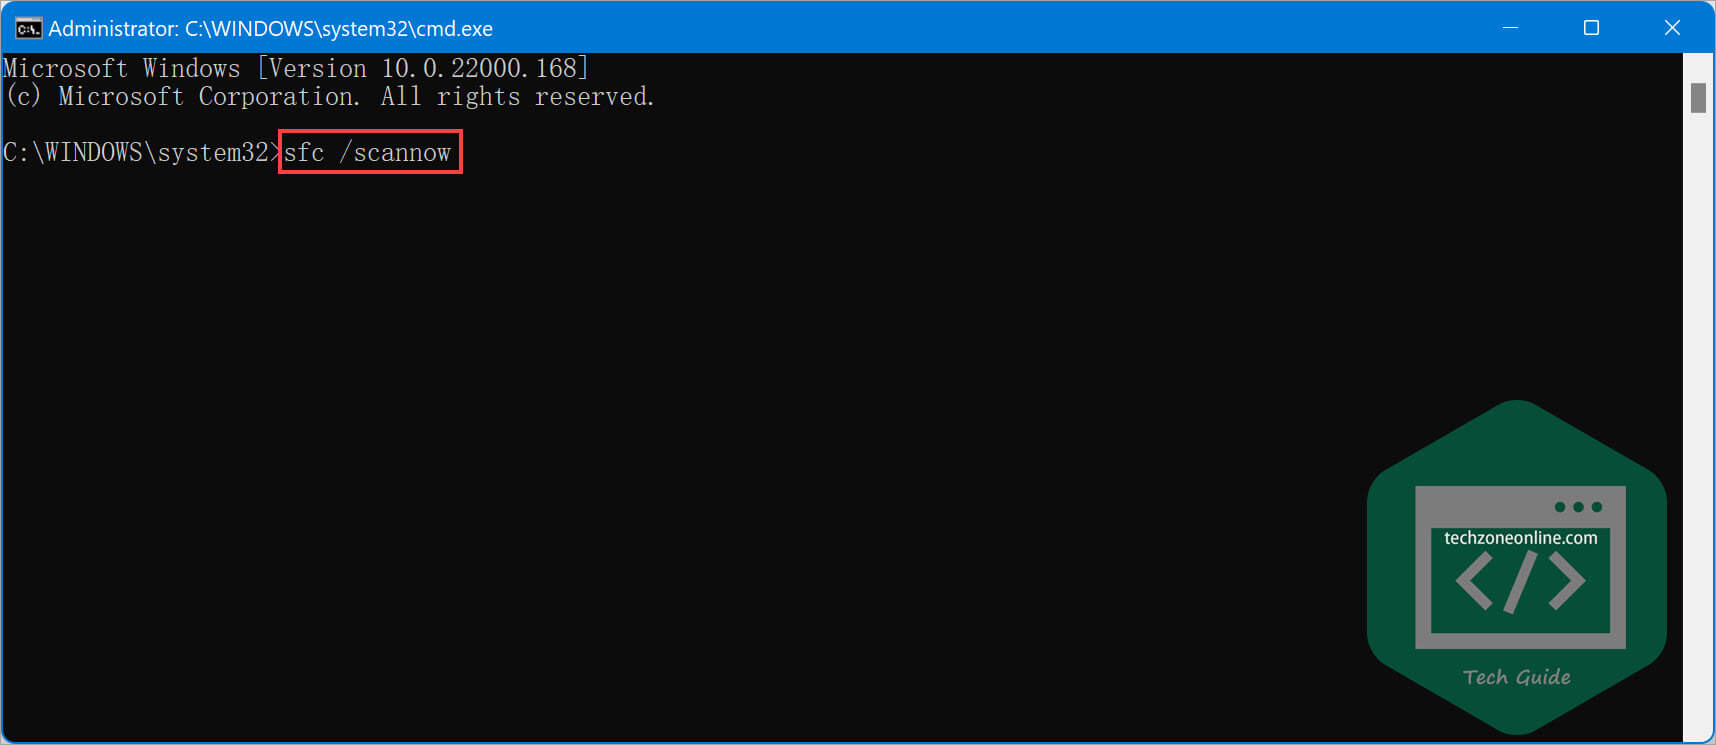
Check if the Windows search issues persists after the SFC command is executed.
If this doesn’t help, you may need to use DISM command tool to repair the Windows Component Store itself. To do so, just follow the steps below:
- In an elevated CMD, execute the following commands one by one (note: this command require Internet access):
DISM /Online /Cleanup-Image /CheckHealthDISM /Online /Cleanup-Image /ScanHealthDISM /Online /Cleanup-Image /RestoreHealth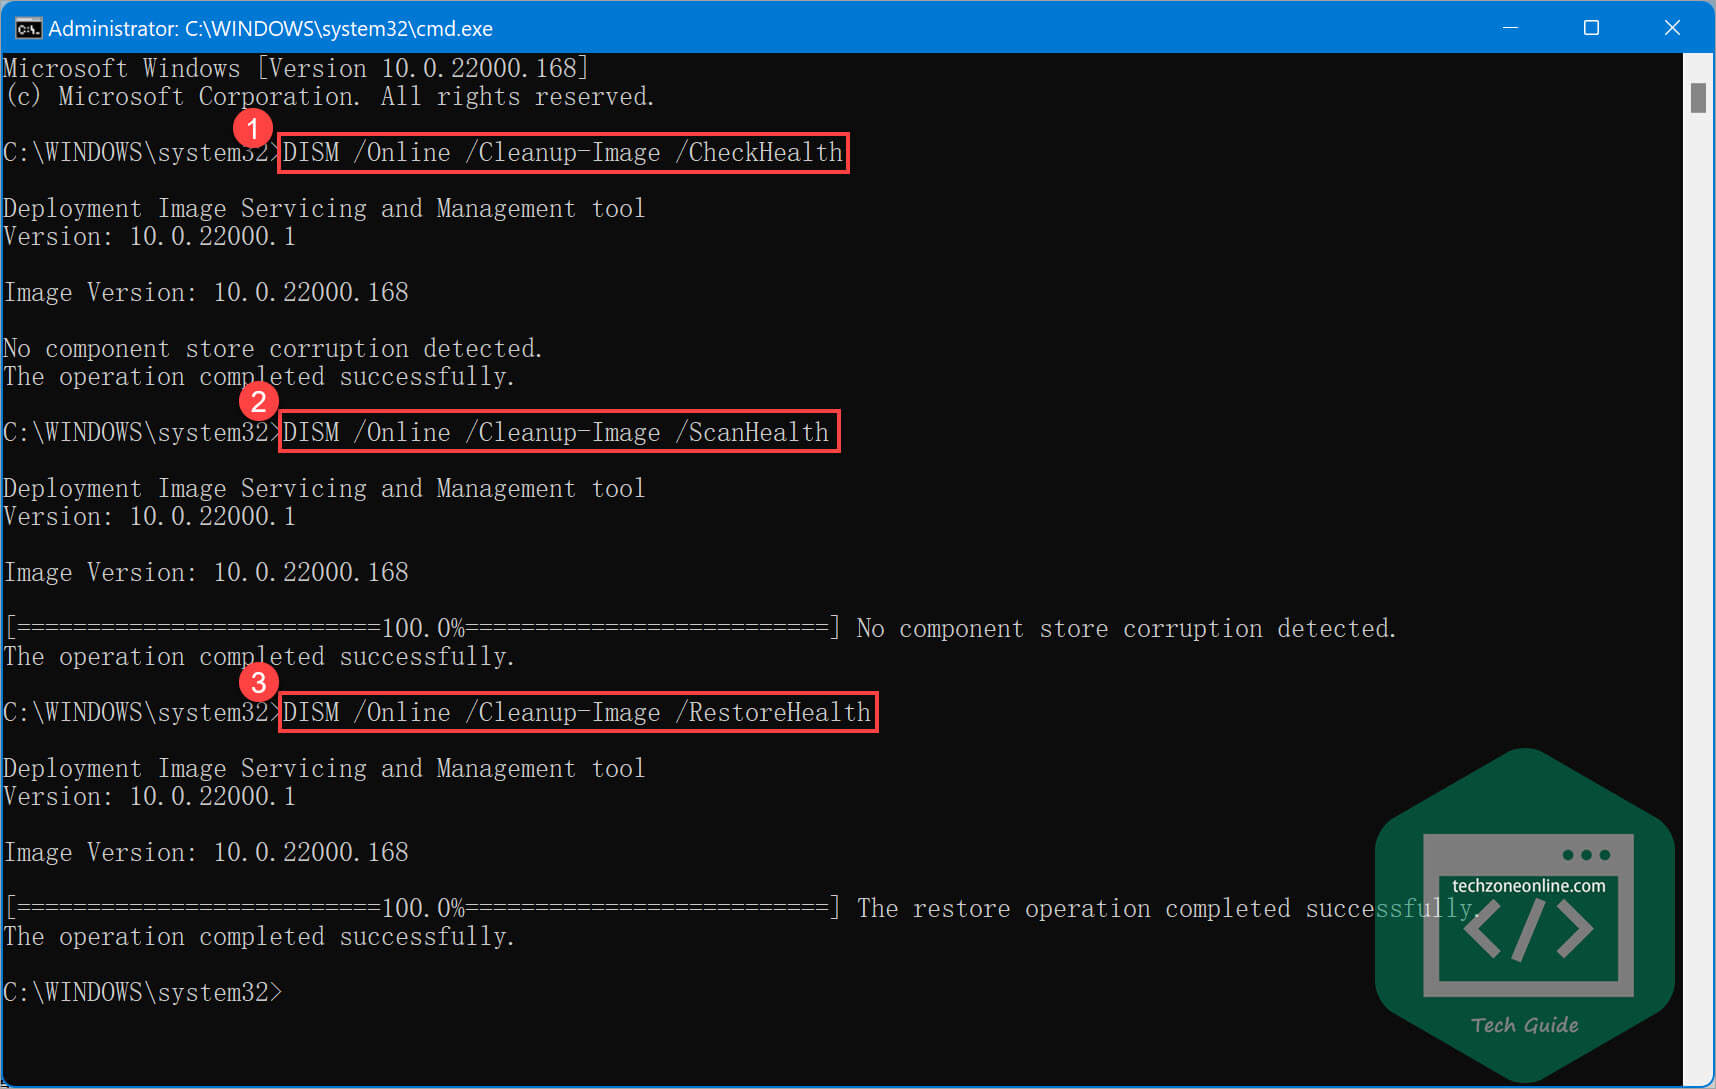
- Restart Windows 11 after all the commands are executed and see if this issue get fixed.
Normally this should resolve all issues. If the File Explorer still crashes, you can run SFC again to fix potential system file corruption and verify that the DISM command tool was successful in repairing the errors.
Uninstall a recent update
If File Explorer keeps crashing after you installed a recent Windows update, you may also try uninstalling that update to see if this issue get fixed. To uninstall a Windows update, follow the steps below:
- On your keyboard, press the Windows logo key and R at the same time to open the Run dialog. Type (or copy & paste) the command line
control /name Microsoft.WindowsUpdateand press Enter to open the Windows Update window.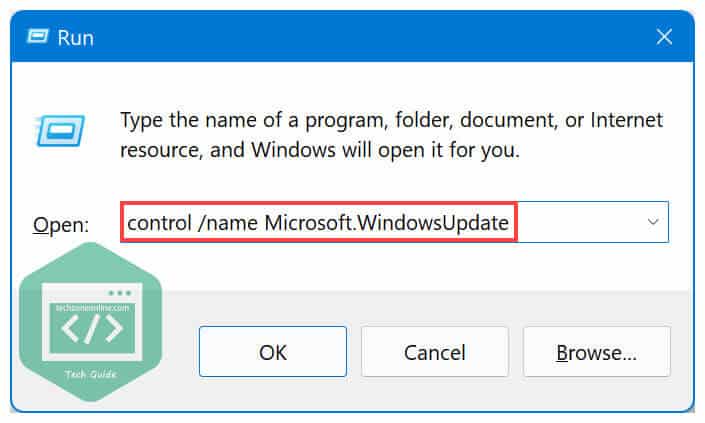
- Click Update history and scroll down to the Related settings part. Click Uninstall updates to continue.
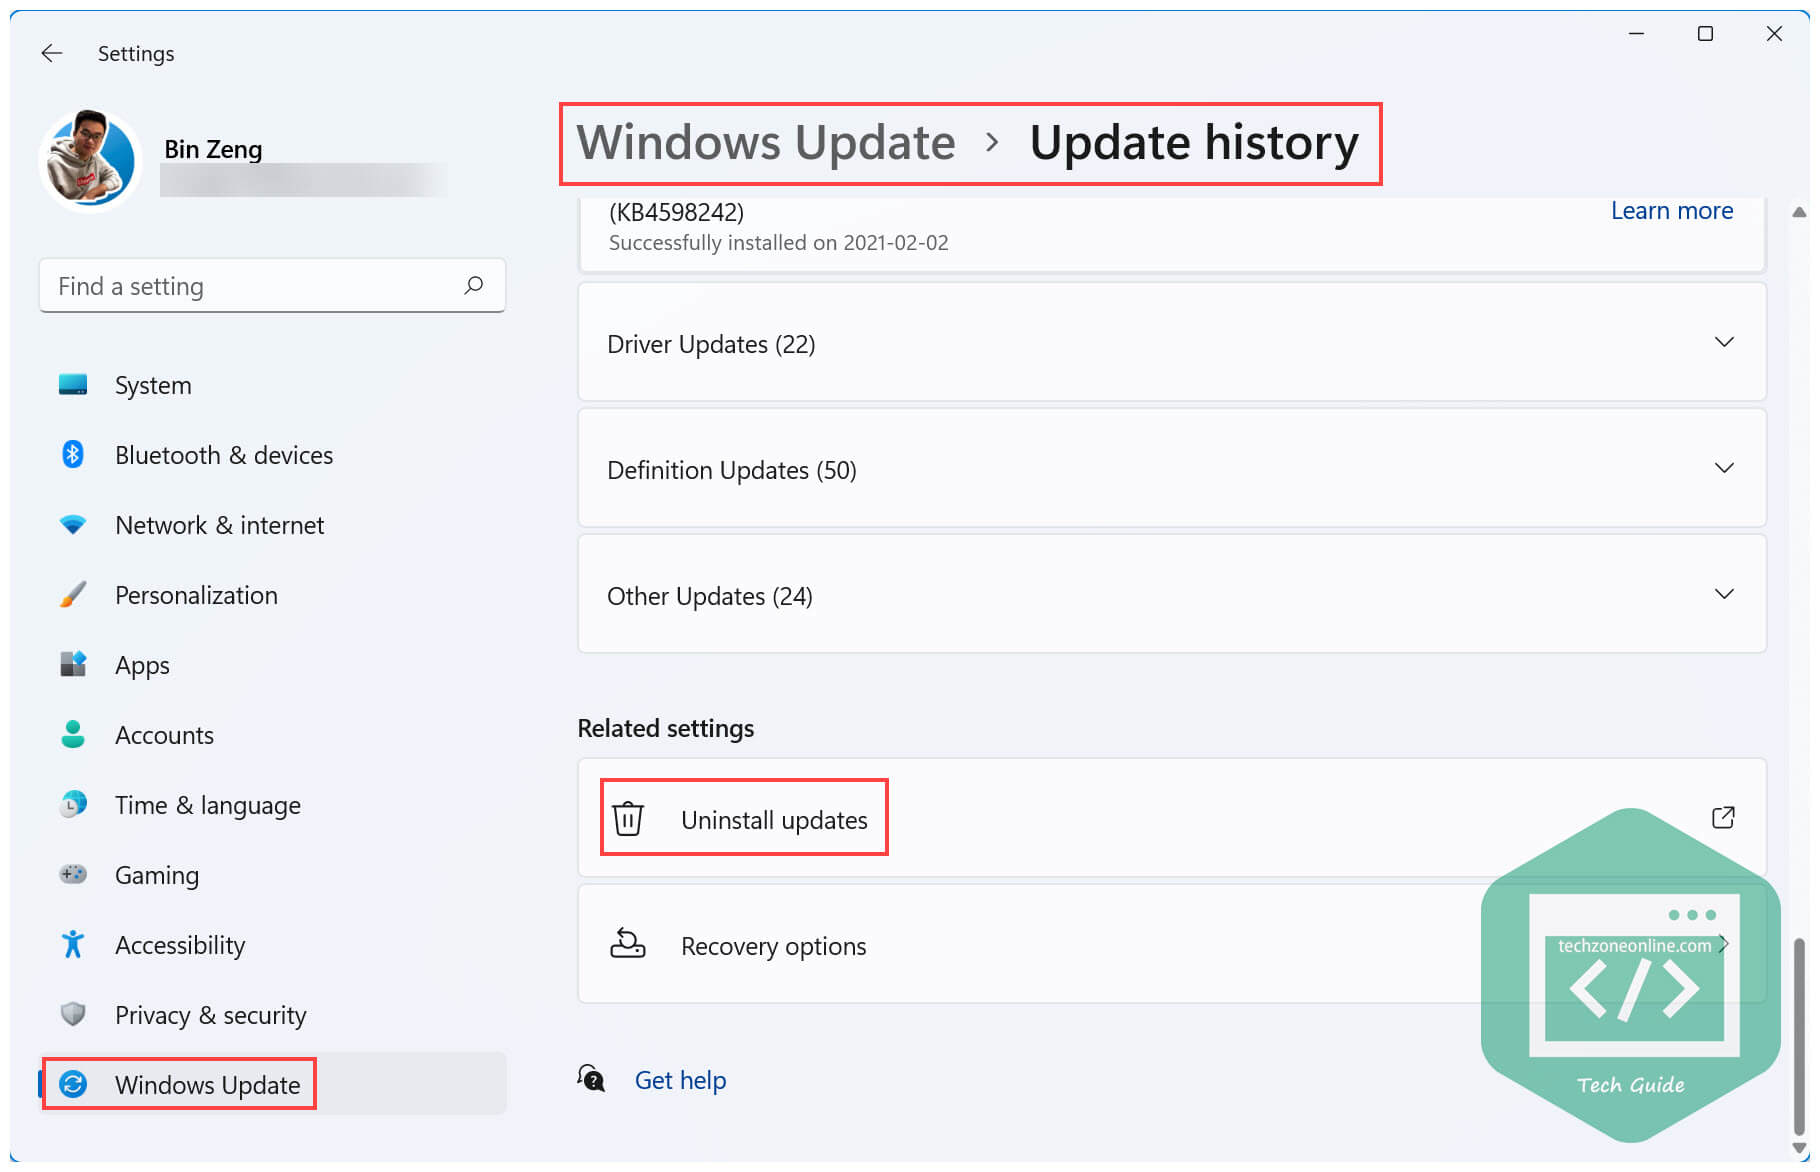
- In the Installed Updates window that pops up, double-click the most recent update and select Yes to uninstall the update.

See if File Explorer crashes again after you uninstalled the recent Windows updates. If File Explorer works properly, congratulations! You’ve fixed this issue.
Adjust File Explorer Options
Some Windows 11 users resolved the File Explorer crashing issue after they adjusted File Explorer Options. If none of the fixes above works, try adjusting File Explorer Options:
- On your keyboard, press the Windows logo key and type file explorer options. Select File Explorer Options to open the File Explorer Options window in Control Panel.

- Under the General tab, click the drop-down menu to set Open File Explorer to This PC. In the Privacy section, click the Clear button to clear File Explorer history.

- Click OK the apply the changes.
See if this fix works. Normally, after adjusting File Explorer Options, the File Explorer won’t crash again.
Hopefully, one of the fixes above helped you fix the File Explorer not responding / keeps crashing issue. If you have any questions or suggestions on this issue, feel free to drop a line in the comment area below. Thanks for reading!
3 responses to “[SOLVED] Windows 11 File Explorer is Not Responding”
This does not solve anything!
This post may not solve anything, it is a bug in windows 11 context menu and Microsoft is too busy making emoji’s to fix it!
Do not mark the thread as solved when there is not a single evidence that the issue has been actually solved. Pathetic.