On October 20, 2021, Microsoft announced the first preview of their Android apps experience into the Windows Insider Program. For Dev, Beta and Release Preview Channel users in the United States on eligible devices running Intel, AMD and Qualcomm platforms, they can install Amazon Appstore to download and run Android apps. However, lots of Android apps are not available on Amazon Appstore. The good news is that Windows 11 allows you to sideload Android apps, so you can still enjoy apps and games not available through Amazon Appstore. After reading this article, you’ll learn how to sideload Android apps on Windows 11.
Before starting
Before you dive right into sideloading Android apps, you’ll need to:
- Enable virtualization
- Enable Hyper-V
- Join Windows Insider Program
Note: If you already have Amazon Appstore up and running on your Windows 11 computer, you can skip this part, because your machine has enabled virtualization and Hyper-V.
To enable virtualization
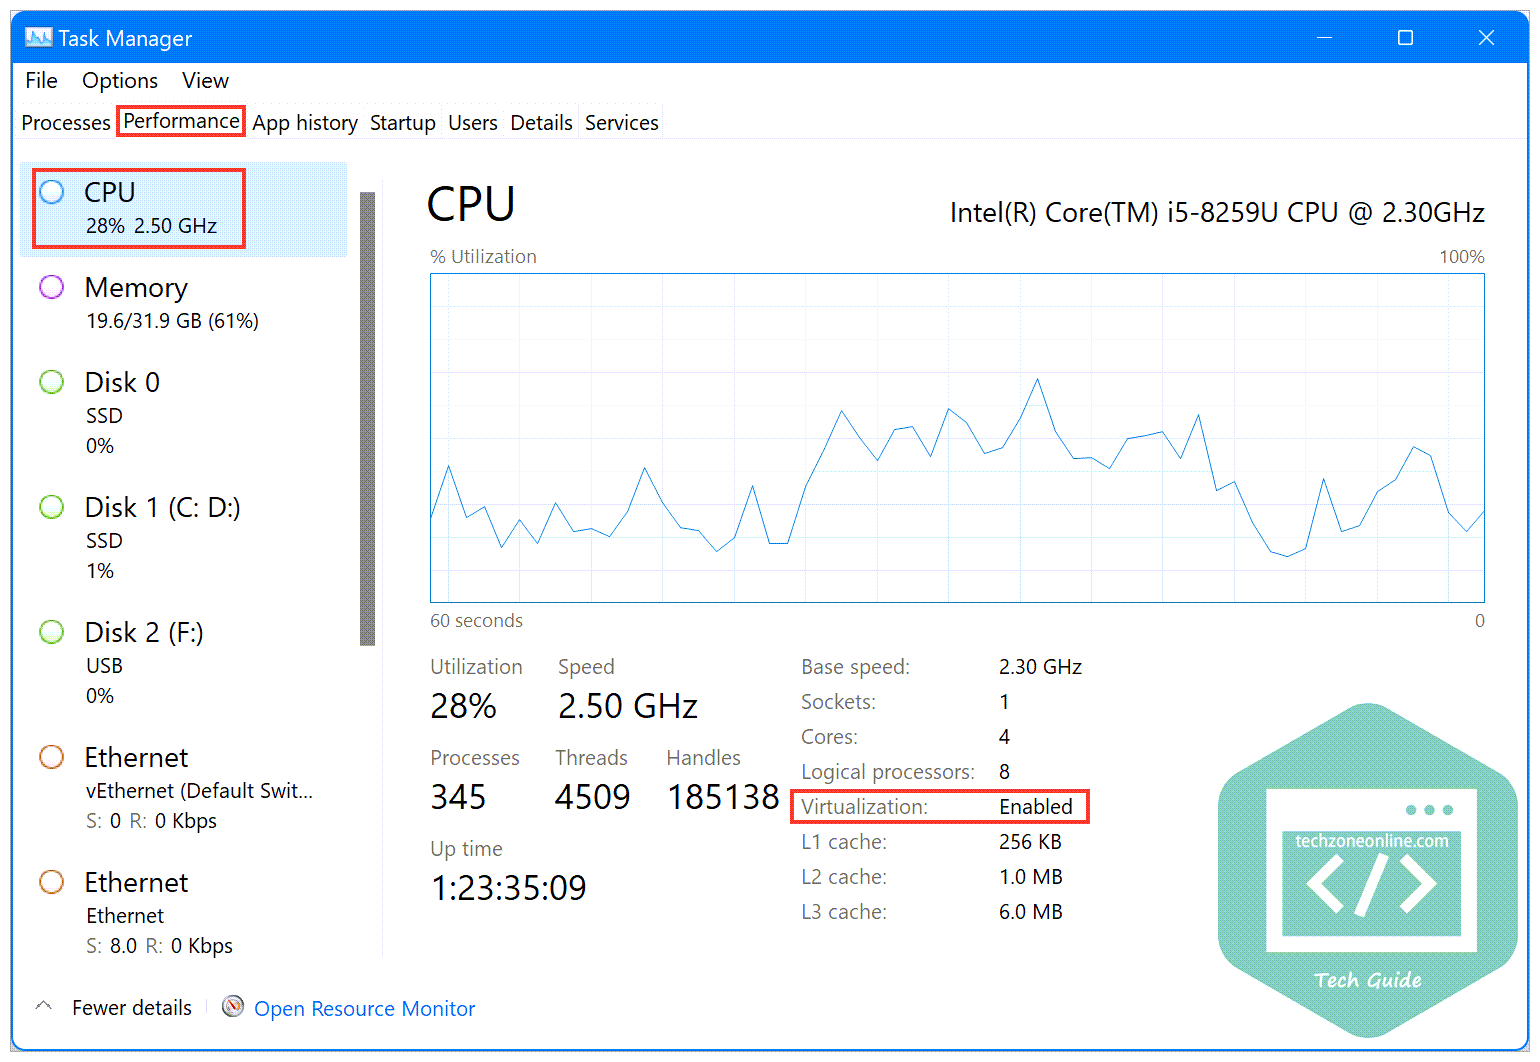
If you’re not sure whether you’ve enabled virtualization on your Windows 11 PC, just follow the instructions below to check:
- On your keyboard, press Ctrl, Shift and Esc and the same time to open Task Manager.
- Navigate to the Performance tab. In the CPU section, you’ll see the virtualization status on your machine.

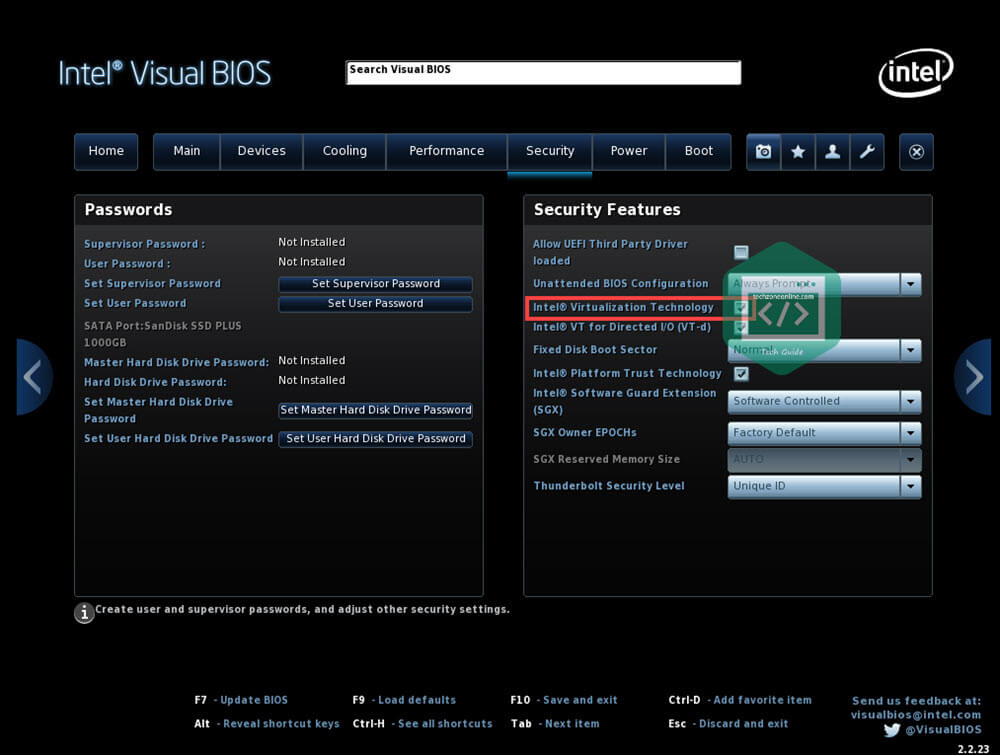
If you haven’t enabled virtualization yet, you’ll need to enable it from the UEFI firmware (BIOS) settings. Here’s how to do it:
- Shut down your machine from the Start Menu, then wait a few seconds and turn it back on.
- When you see the boot screen, follow the on-screen instruction to press the correct key on your keyboard to enter the BIOS menu. (depending on your computer manufacturer, you may need to press F2, F10 or F12 key to enter the BIOS menu)

- Once you’ve entered the BIOS setup, find the Virtualization field and change the value to enabled, or check the box next to Virtualization to enable it.


To enable Hyper-V
Hyper-V is Microsoft’s hardware virtualization product that allows you to create and run a virtual machine on your computer. To sideload Android apps on Windows 11, you need to have Windows Subsystem for Android installed, which requires Hyper-V to be enabled.
Note: Hyper-V is built into Windows as an optional feature — there is no Hyper-V download.
Hyper-V requirements
- Windows 11 Enterprise, Pro, or Education.
- 64-bit Processor with Second Level Address Translation (SLAT).
- Minimum of 4 GB memory.
Follow the steps below to enable Hyper-V on your Windows 11 computer:
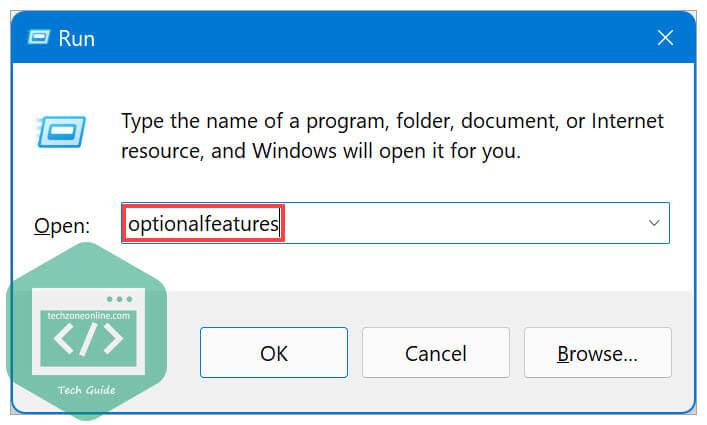
- On your keyboard, press the Windows logo key and R at the same time to invoke the Run command box. Enter
optionalfeaturesand press Enter to open the Windows Features window.
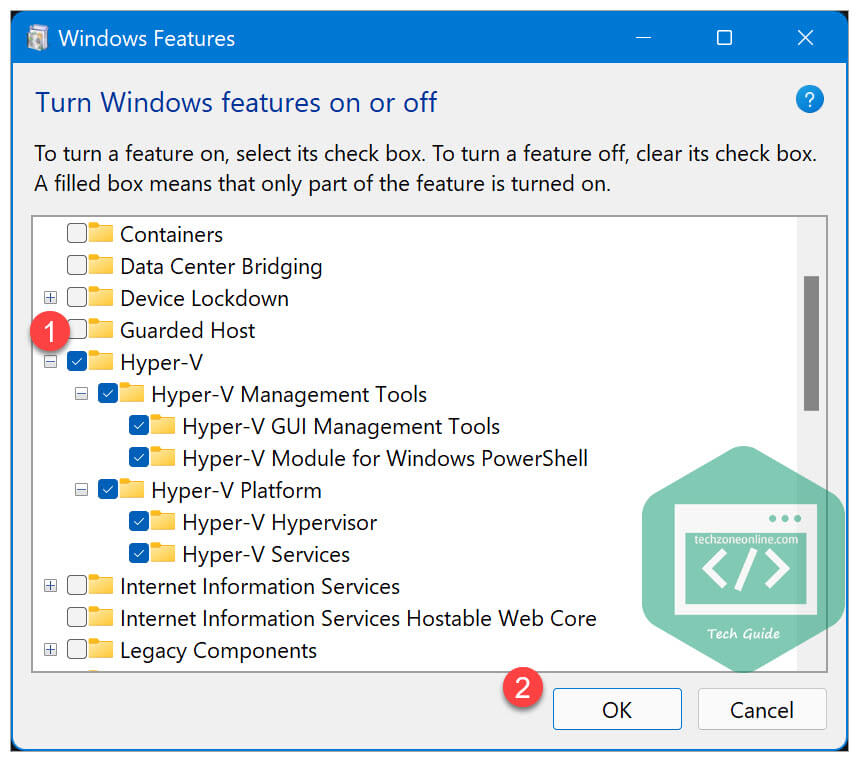
- Check the boxes next to all the Hyper-V related features. Then click OK.

- Restart Windows 11 and Hyper-V will be enabled.
Install Windows Subsystem for Android
Next, you need to install Windows Subsystem for Android on your Windows 11 computer. If you’ve installed Windows Subsystem for Android, just skip step 1-2.
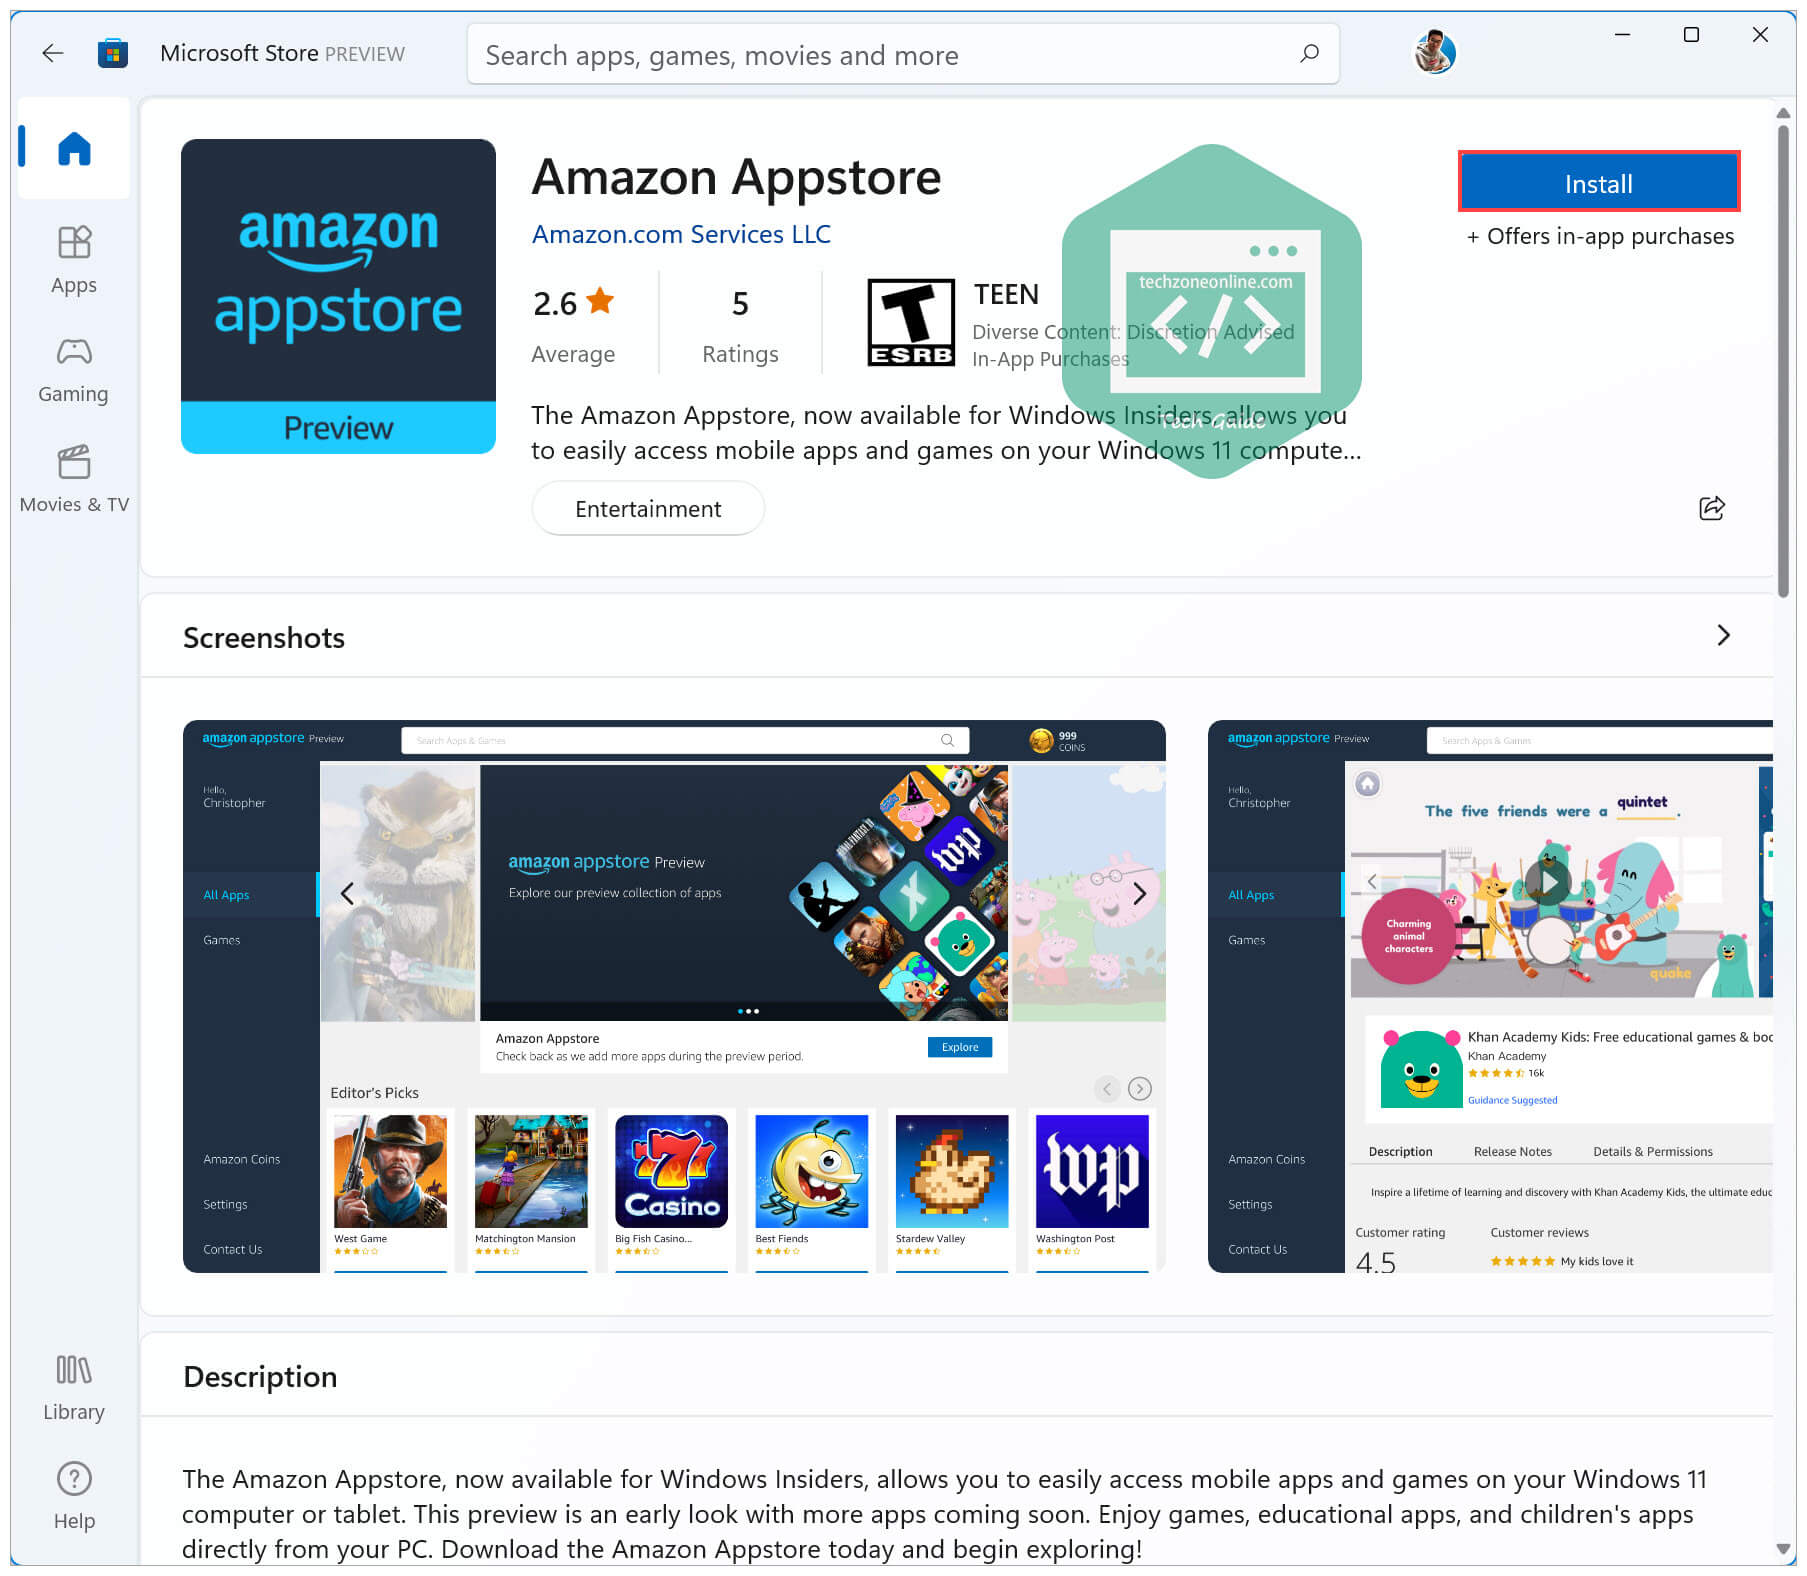
- Launch Microsoft Store and search for Amazon Appstore. Click the Install button to install Amazon Appstore.

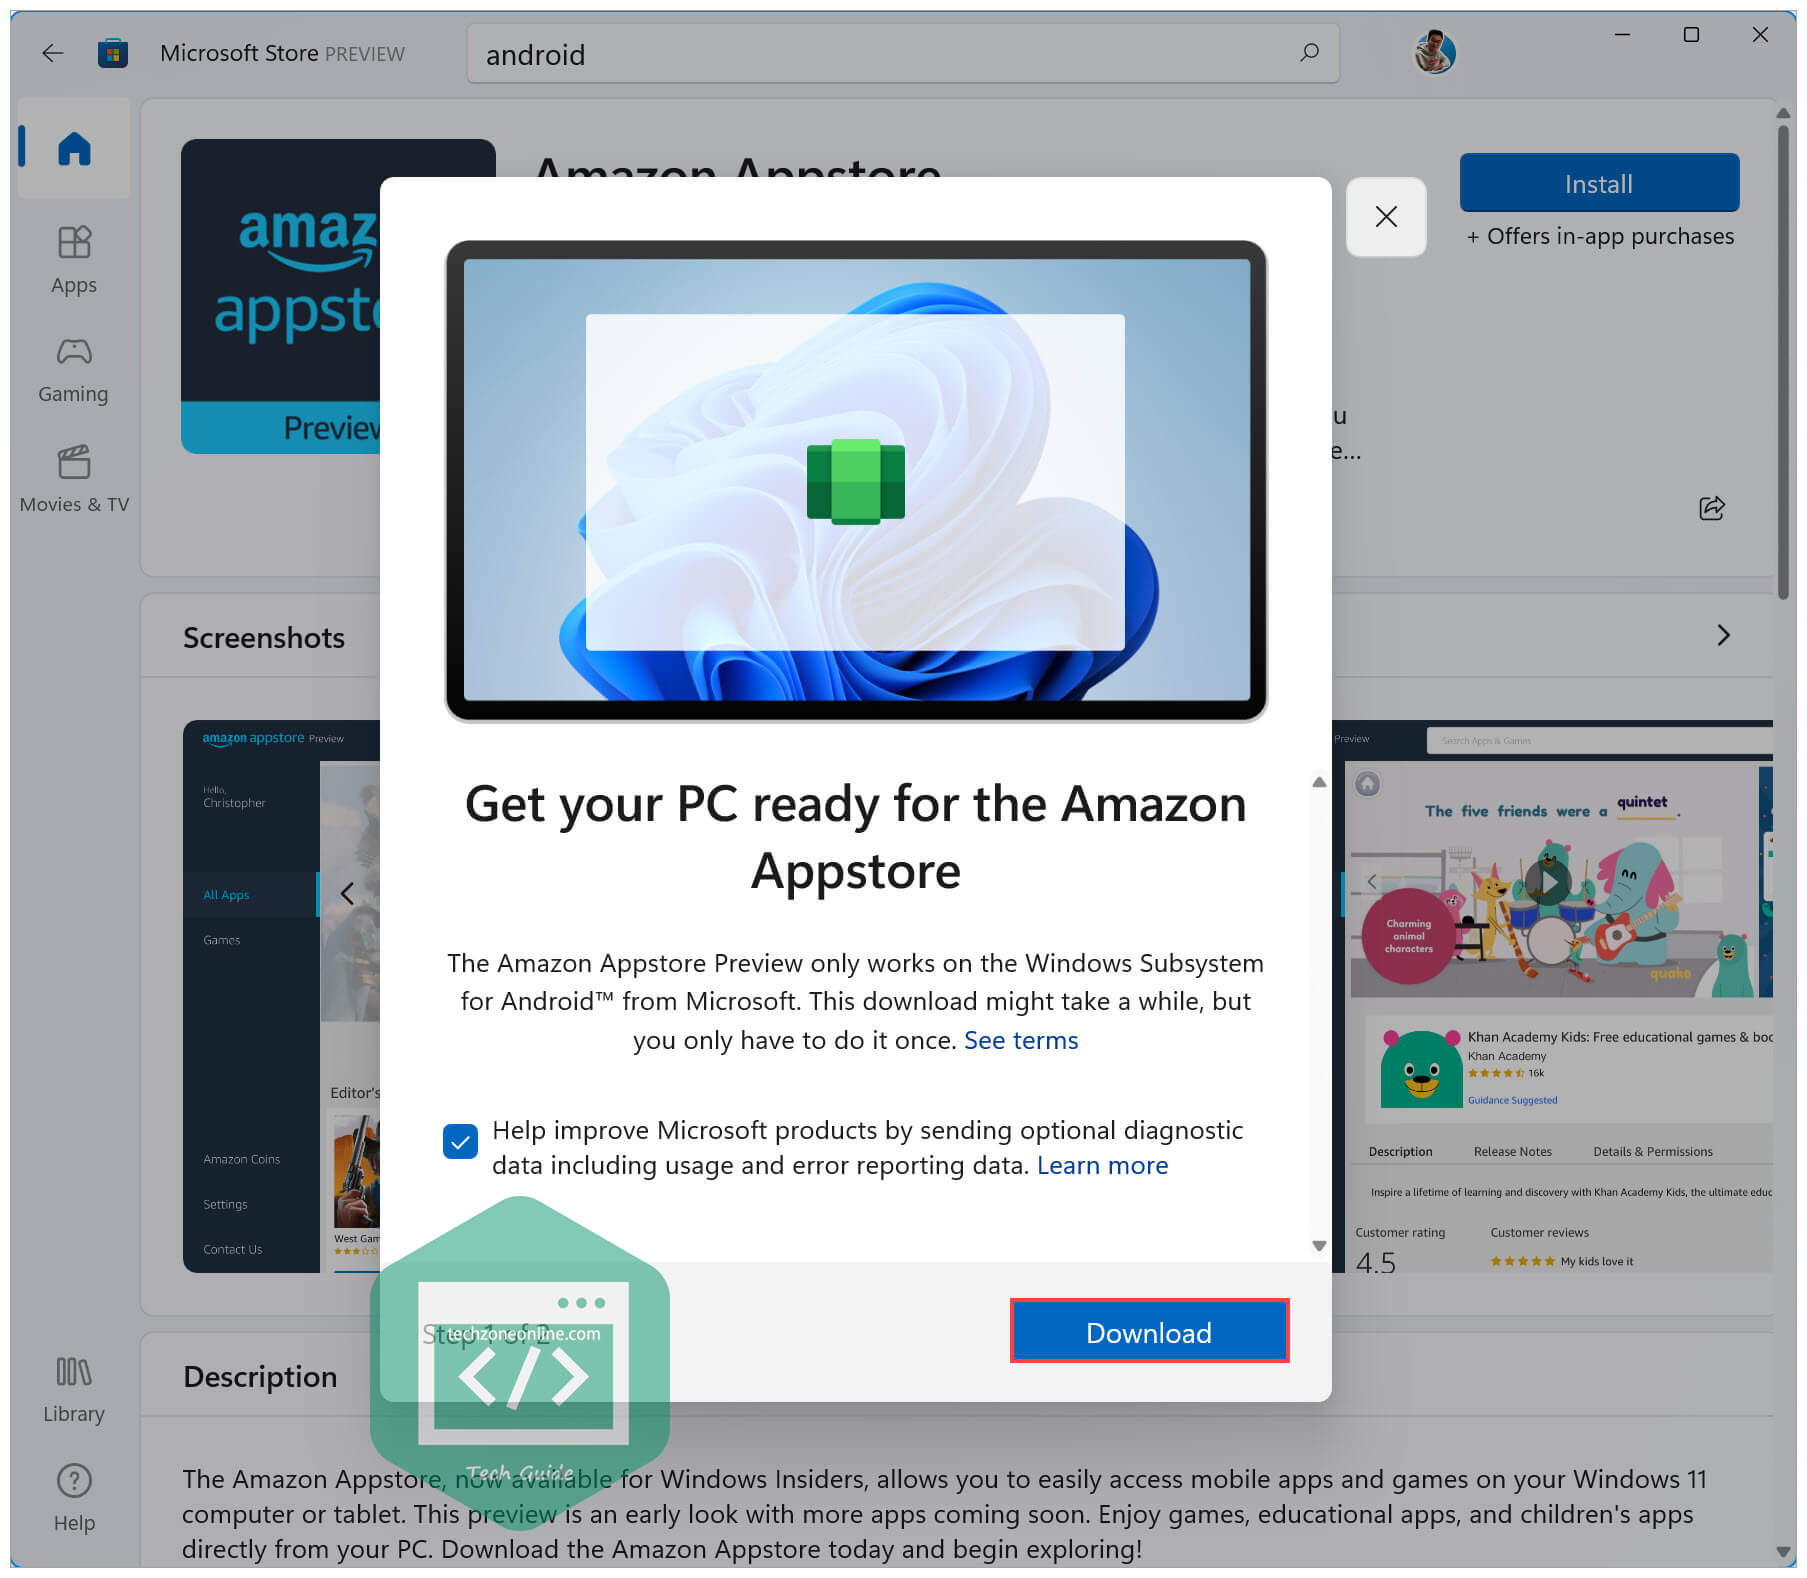
- To get the Amazon Appstore work on your Windows 11 machine, you’ll be required to download the Windows Subsystem for Android from Microsoft. Click Download to start downloading.

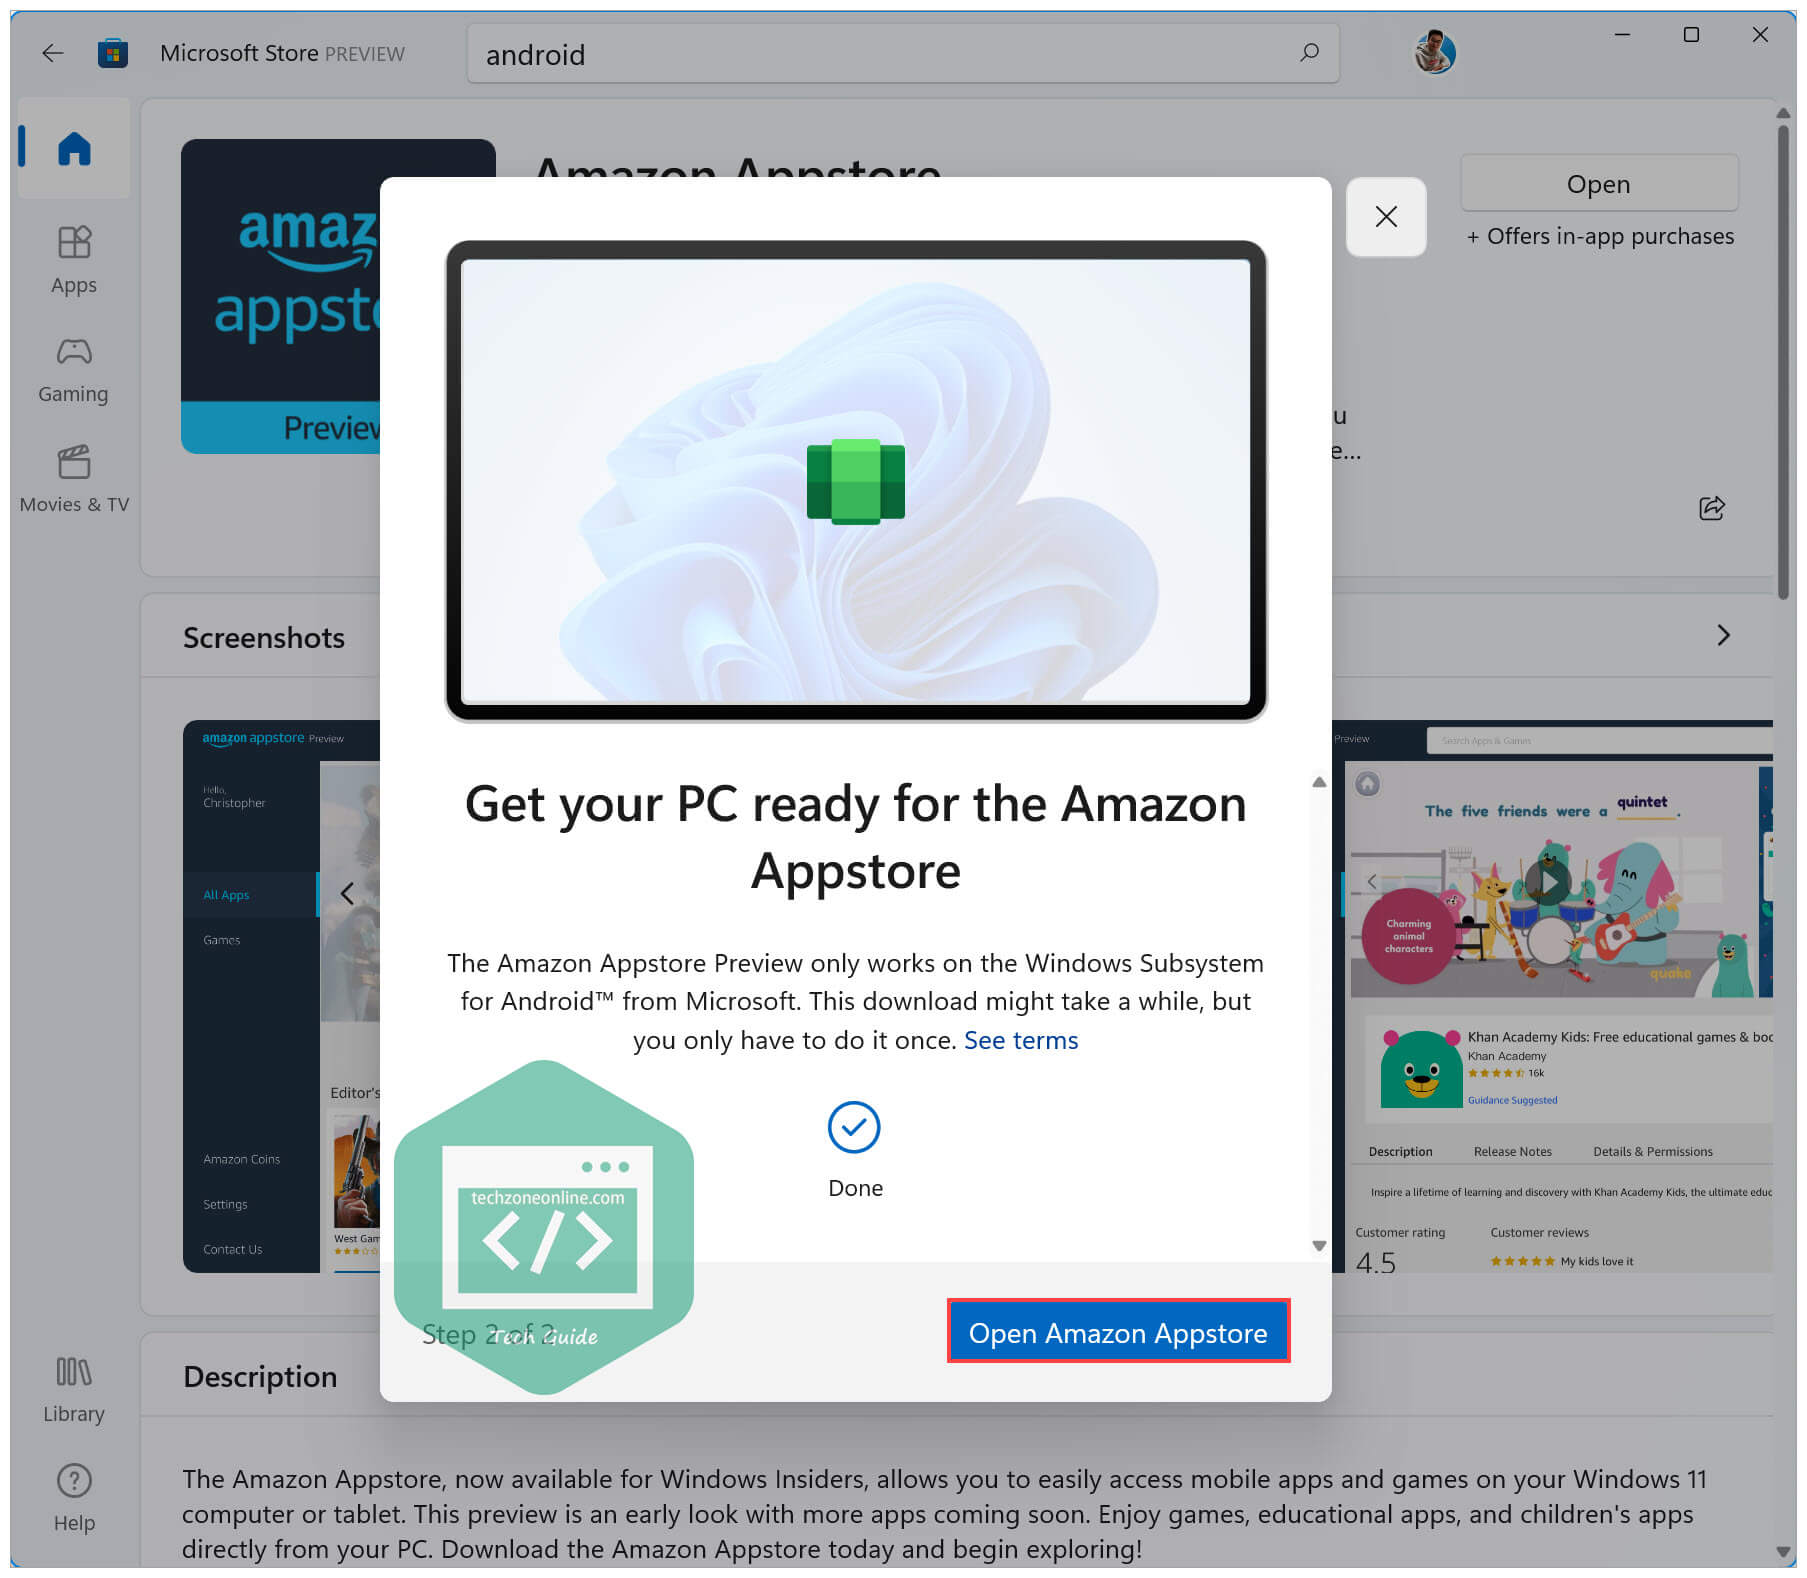
- Once downloaded, click Open Amazon Appstore to launch Windows Subsystem for Android.
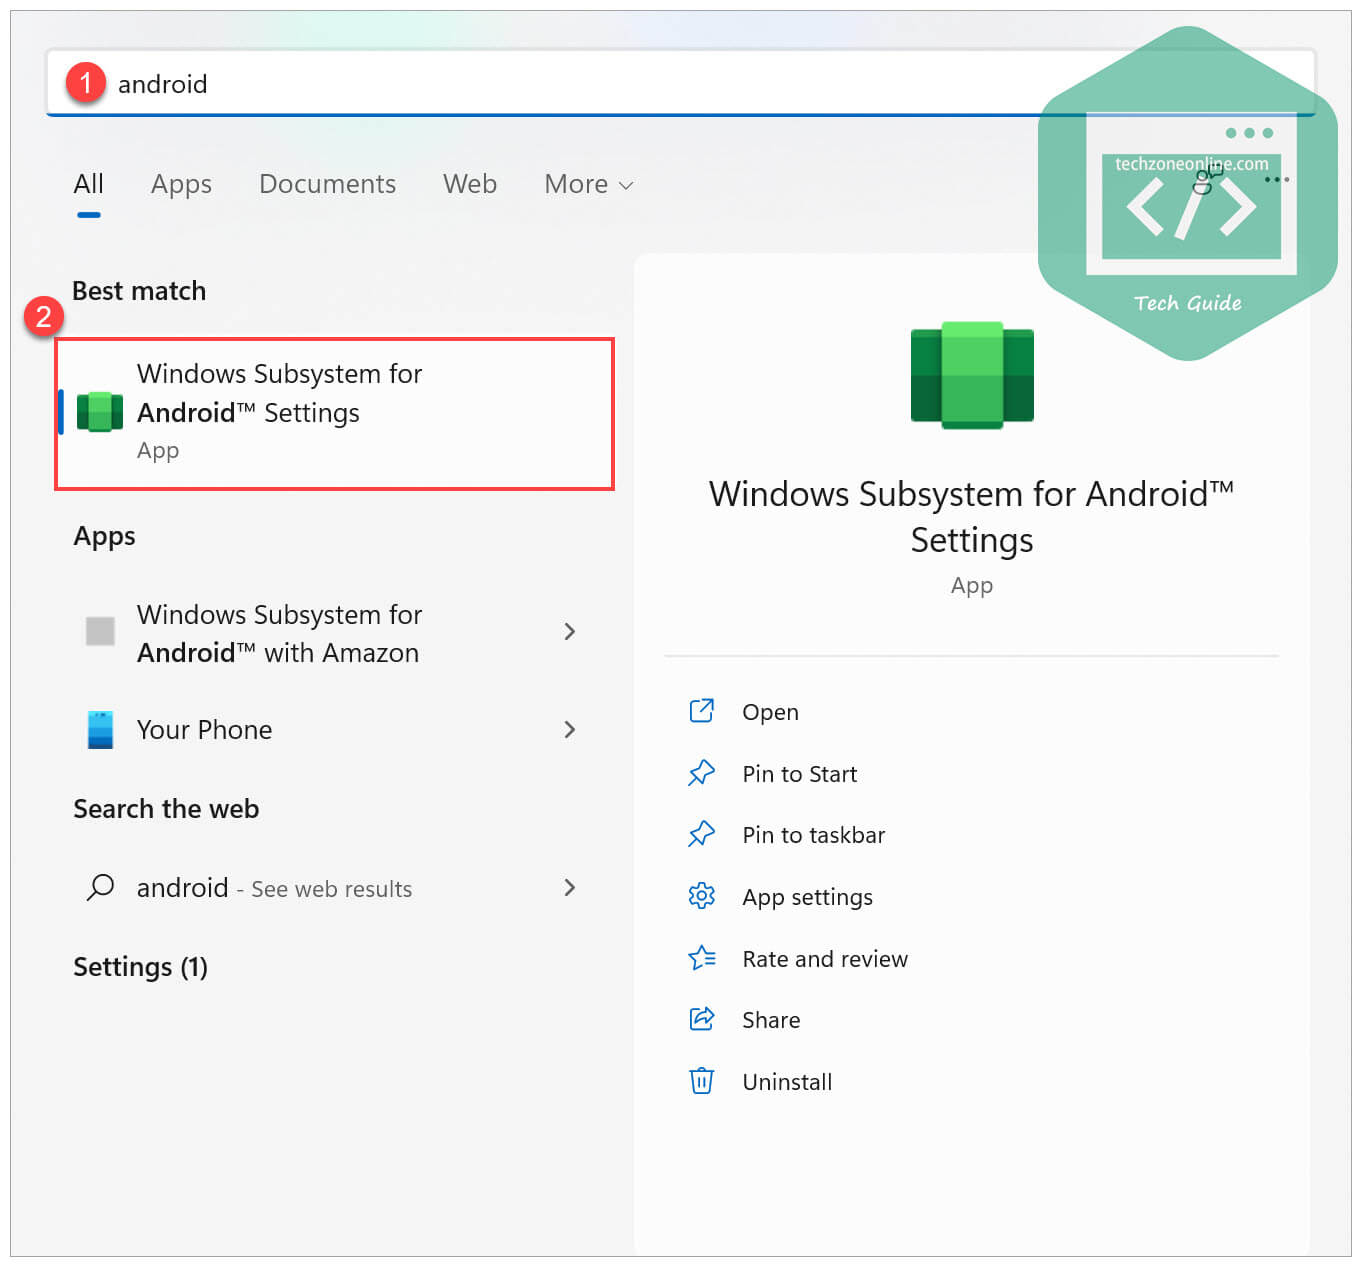
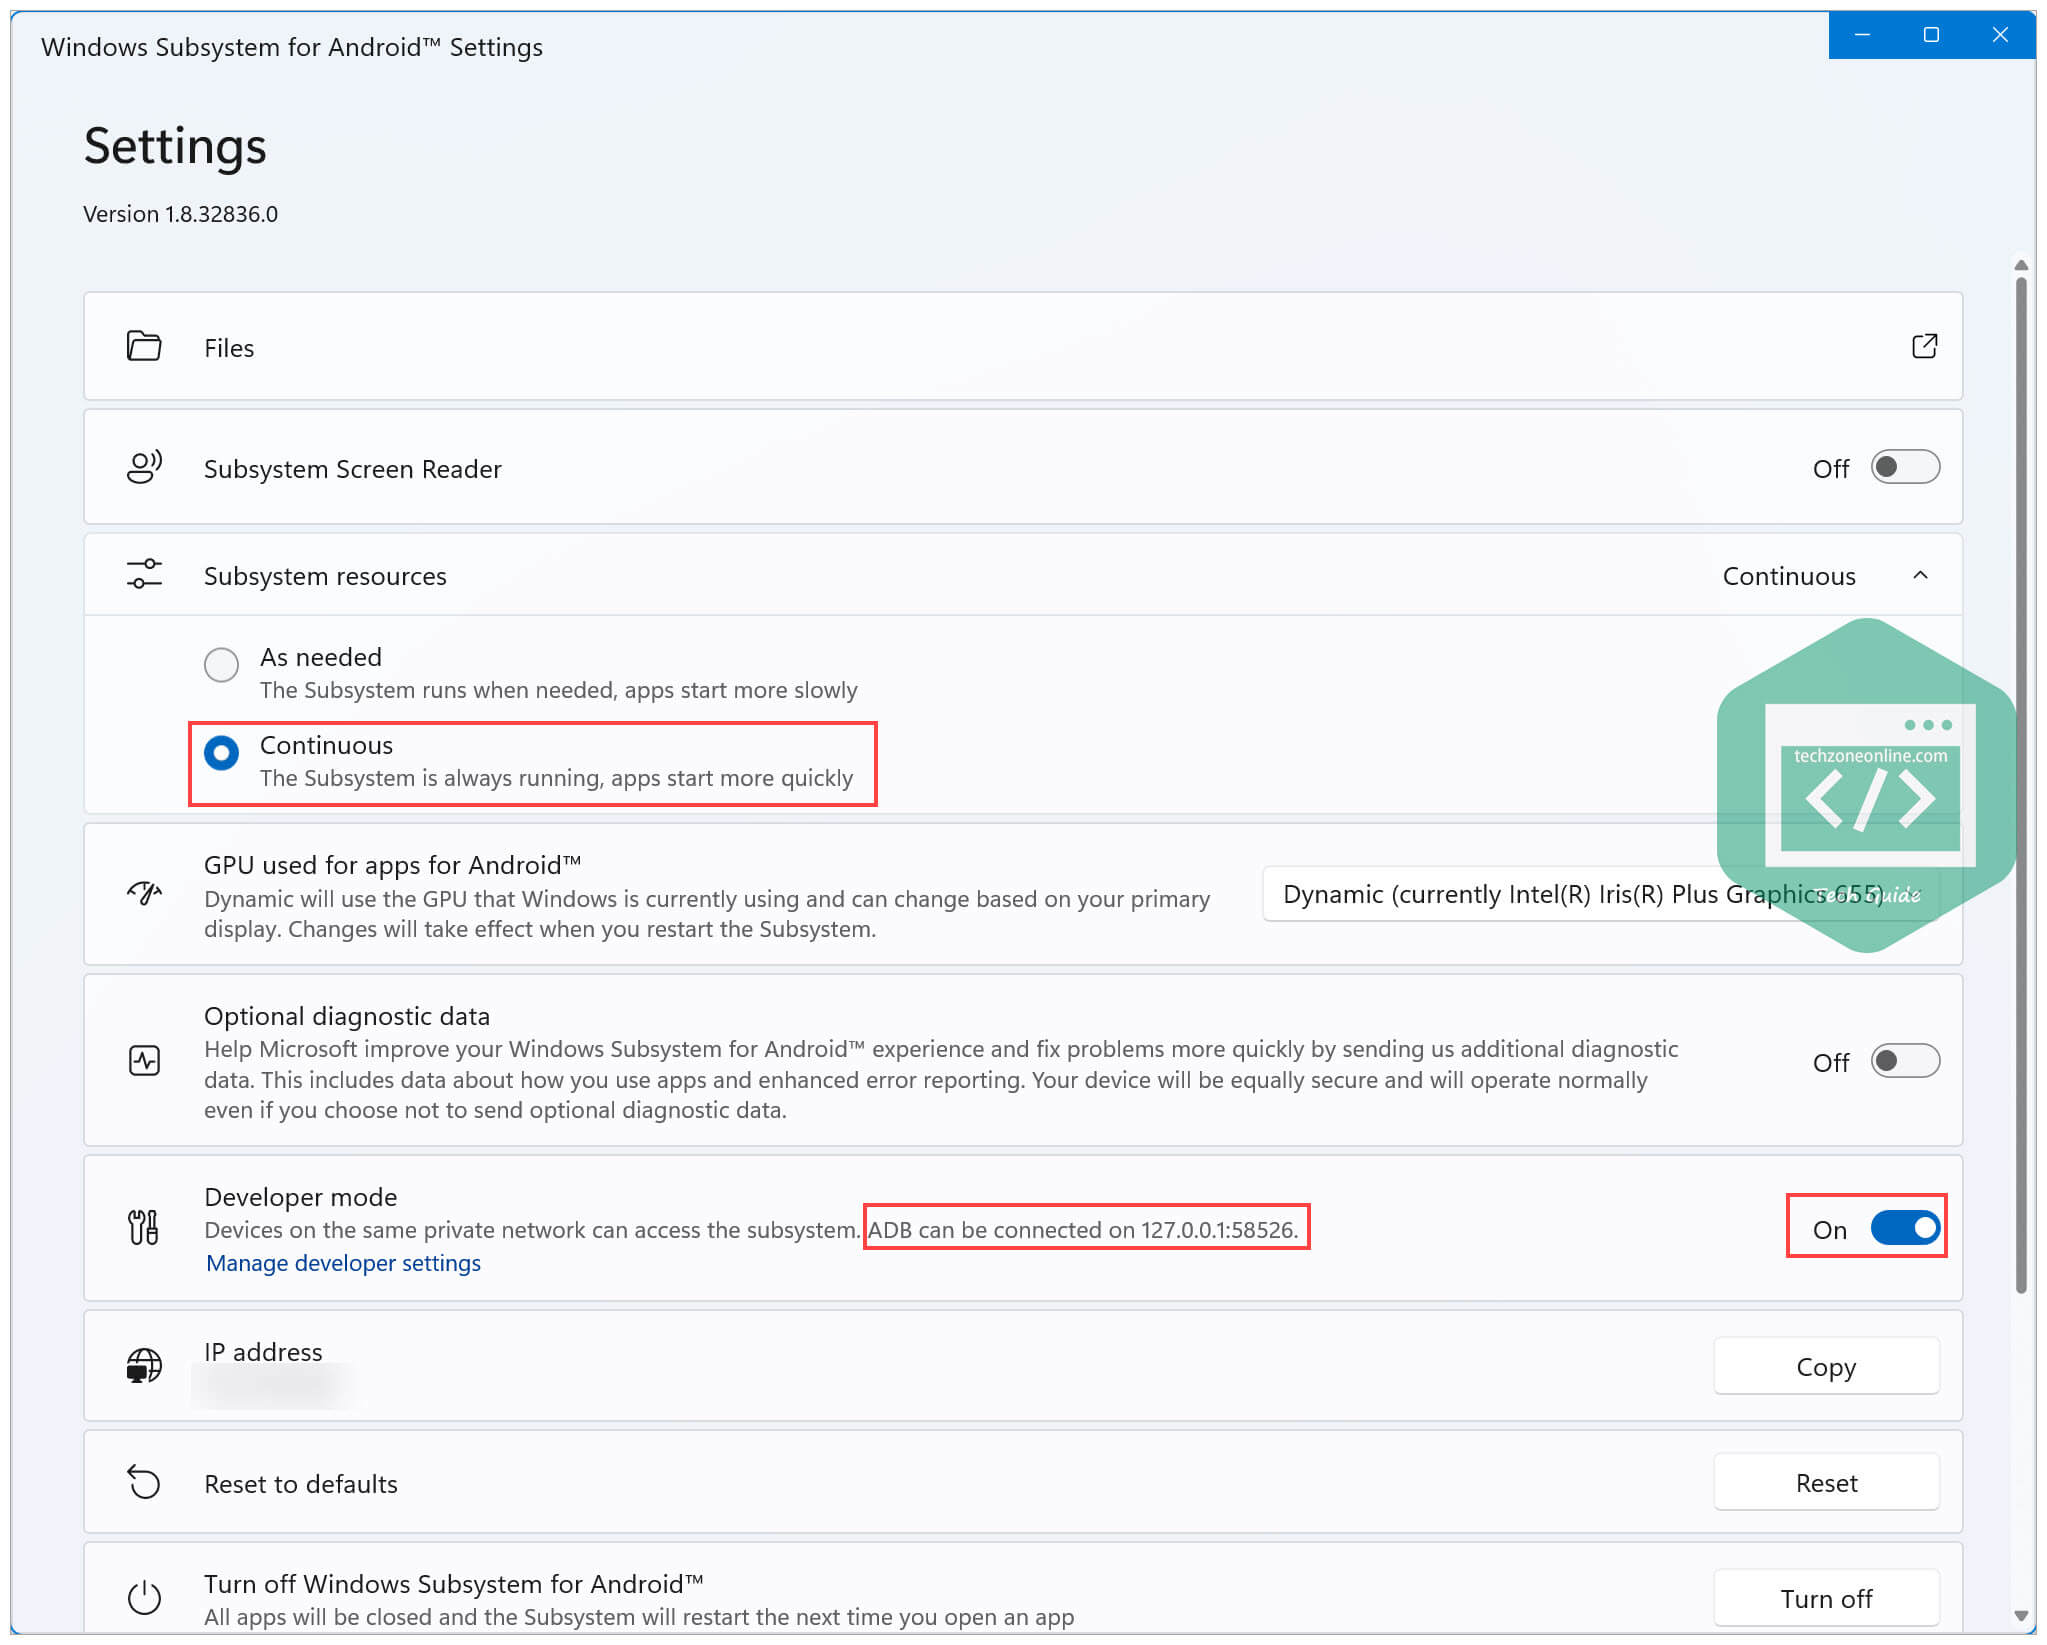
- On your keyboard, press the Windows logo key, and type android to search for Windows Subsystem for Android. Click on the best match result to open the Windows Subsystem for Android settings.

- Set the Subsystem resources to Continuous, then turn on Developer mode. Note the IP address displayed on the Developer mode tile.

Download Android Platform Tools
After you enabled virtualization and installed Windows Subsystem for Android on your computer, you need to download the Android SDK Platform tools to sideload Android apps on your Windows 11 machine.
Just follow the steps below to download the Android SDK Platform tools:
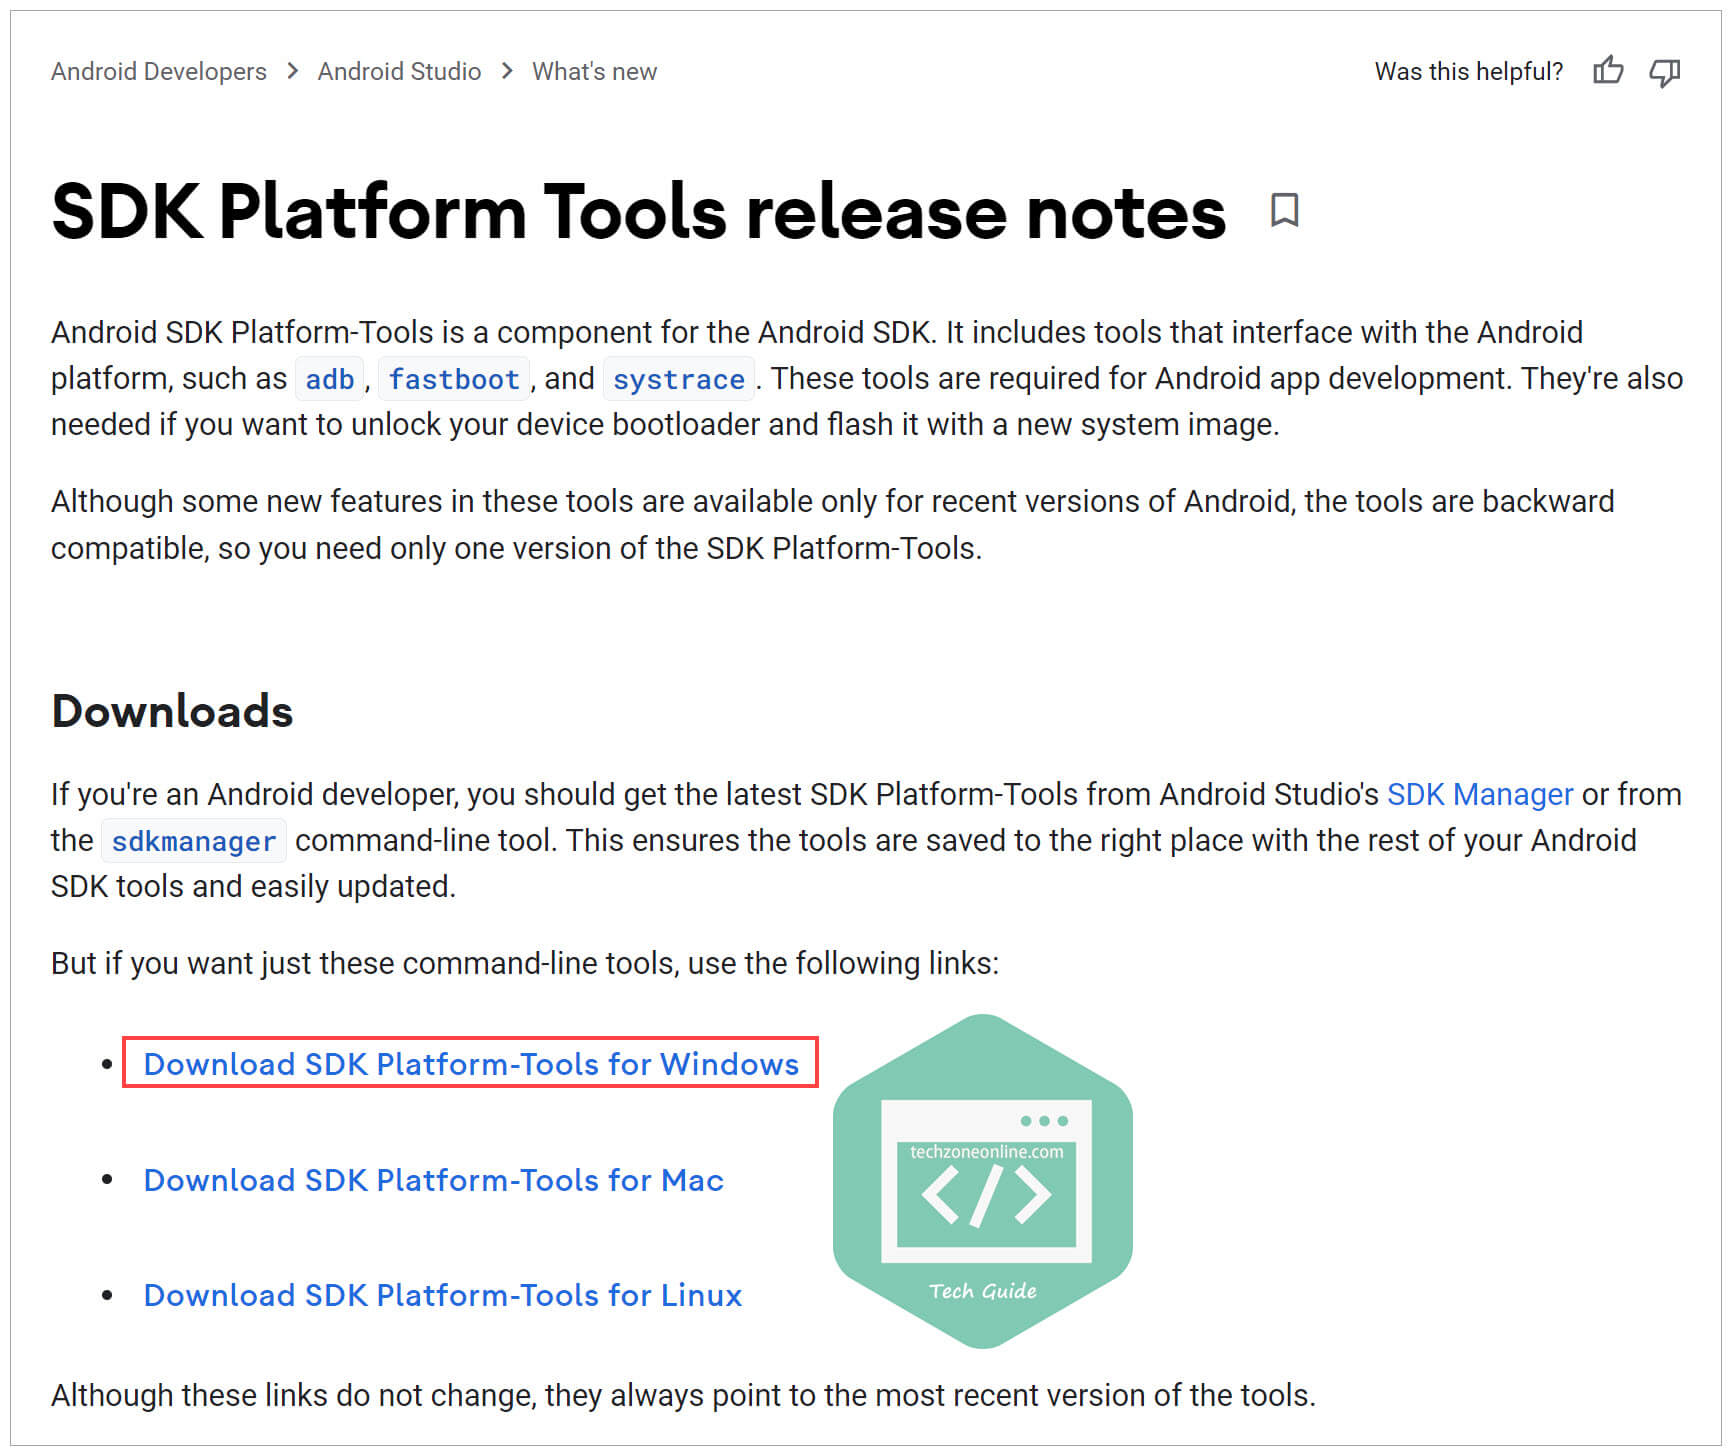
- Go to the official Android Studio SDK Platform tool page.
- Click on Download SDK Platform-Tools for Windows.

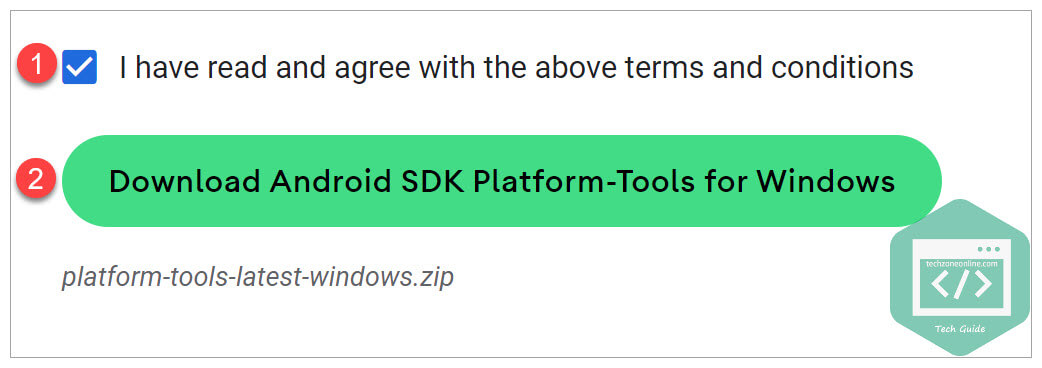
- Check the box next to I have read and agree with the above terms and conditions, then click Download Android SDK Platform-Tools for Windows to start downloading.

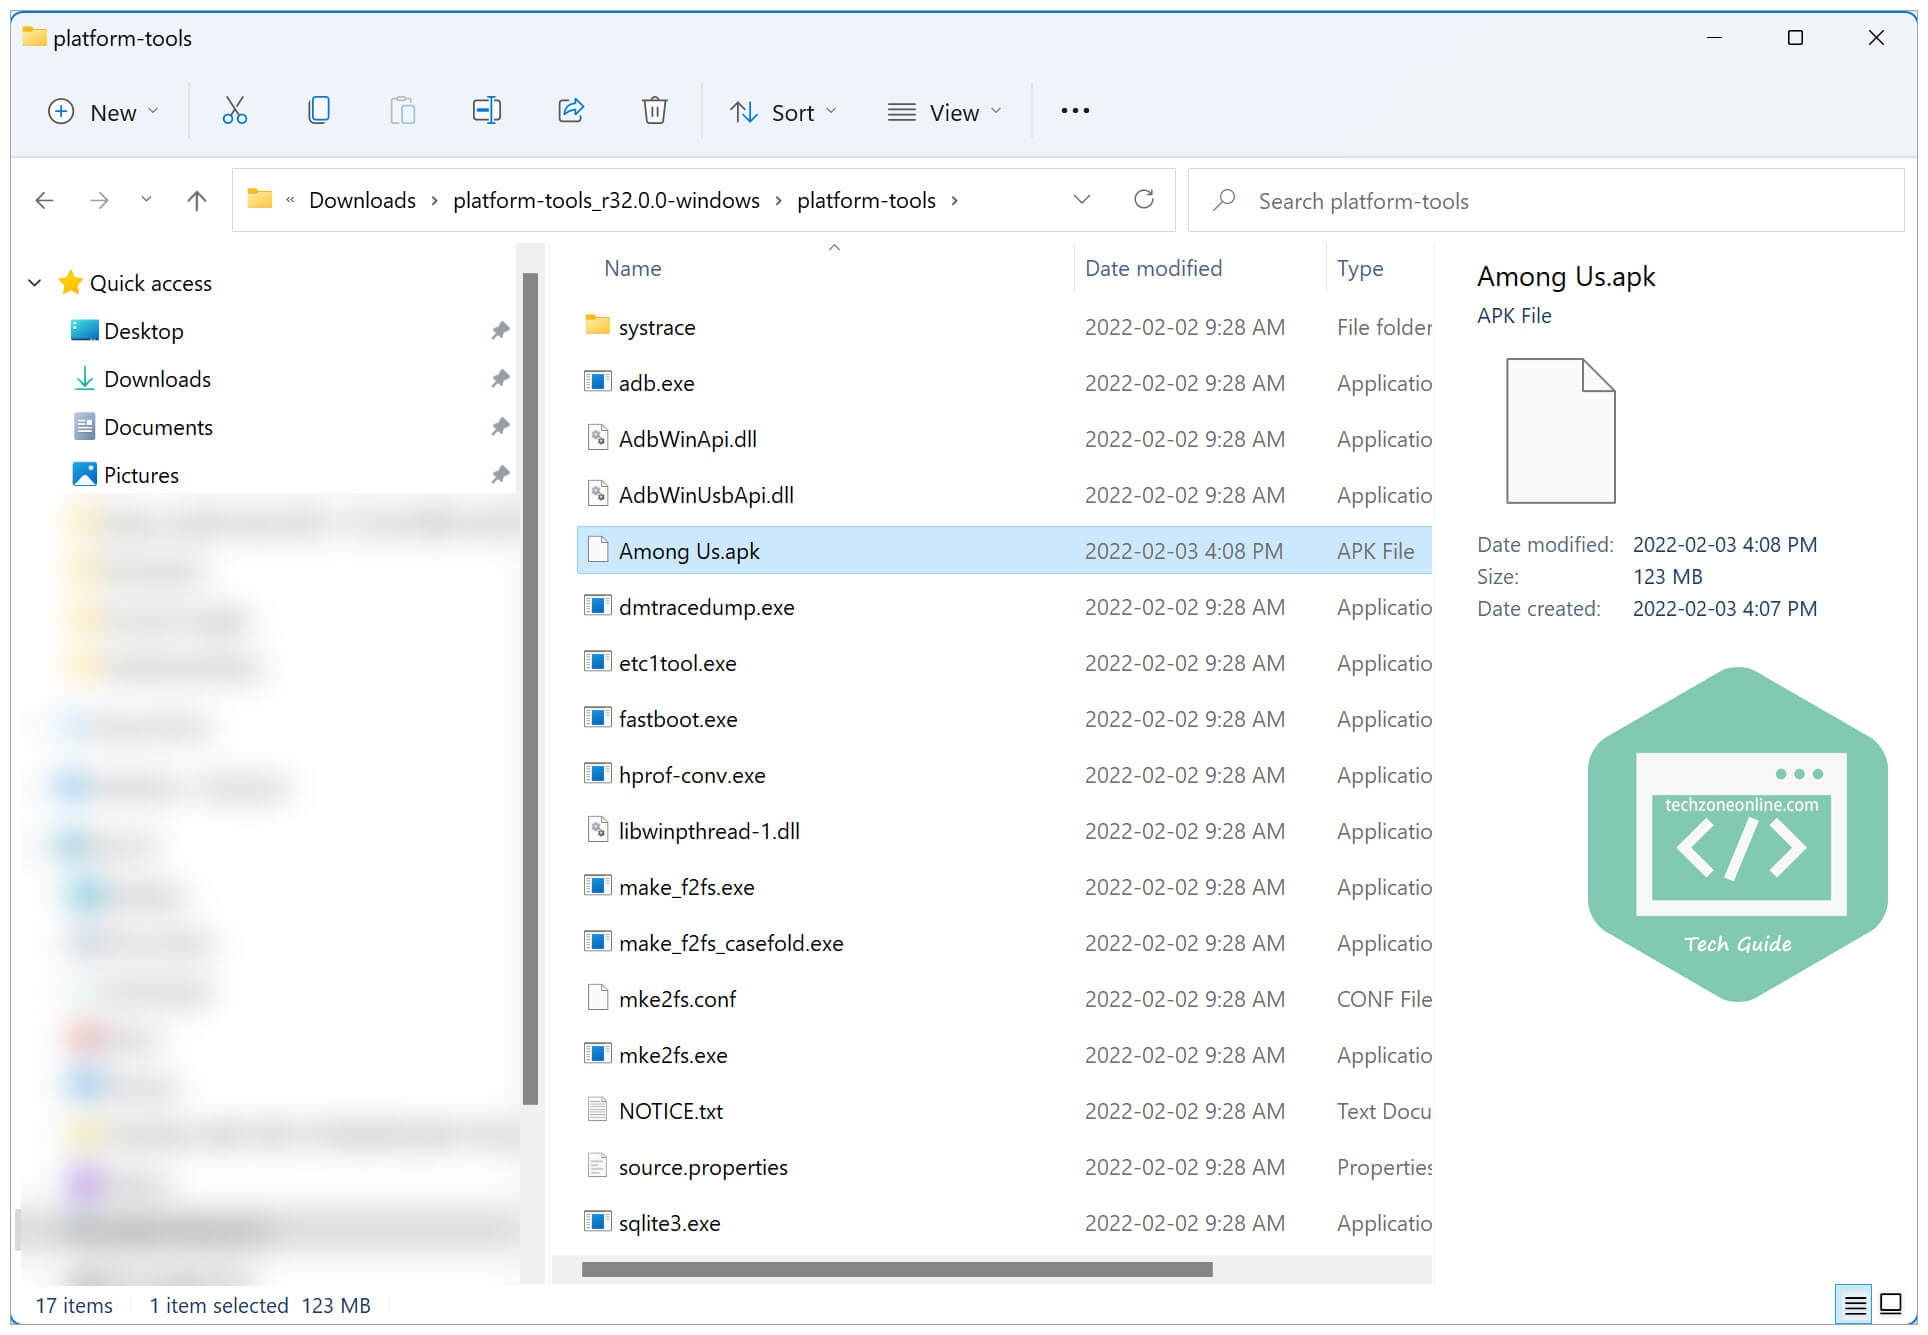
- Once downloaded, locate the downloaded .zip file. Right-click on it and select Extract all… to extract the .zip file.

- Download the Android app installation package and save it to the platform-tools folder. If you don’t know where to download the .APK file, you can go to apkpure.com.


Sideload Android apps on Windows 11 PC
Now, you can start sideloading Android apps on your Windows 11 machine. Here’s how:
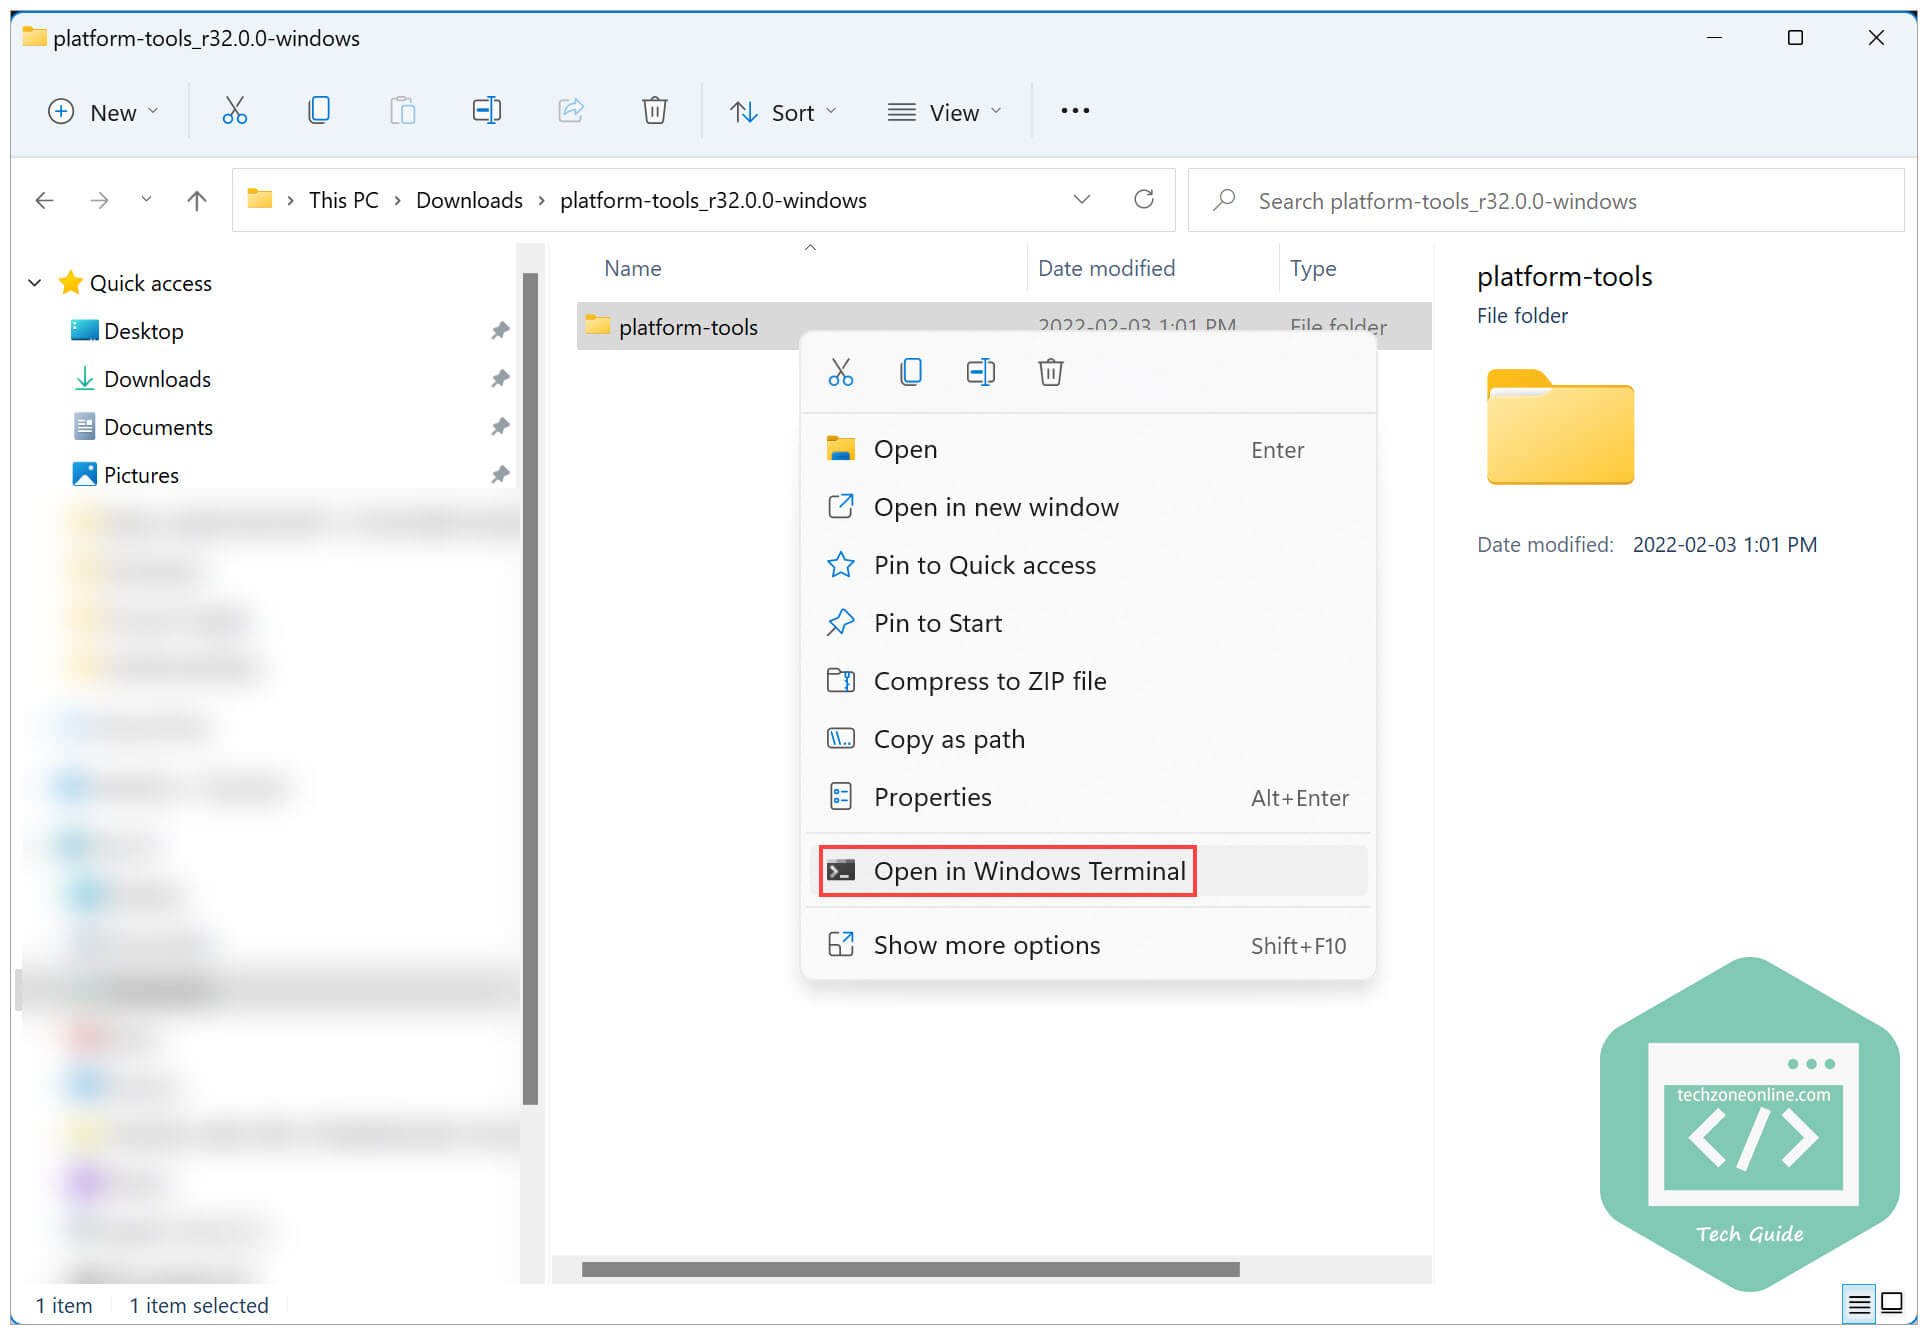
- Right-click on the platform-tools folder and select Open in Windows Terminal.
- Execute the command below to connect with Android Debug Bridge (ADB):
.\adb connect <IP address>
Note: you need to replace the <IP address> placeholder with the IP address displayed on the Developer mode tile in the Windows Subsystem for Android settings.
- After you see “already connected to <IP address>“, execute the command below to install / sideload the Android app:
.\adb install "your app.apk"
Note: you need to replace your app.apk to the file name of the .apk file you downloaded.
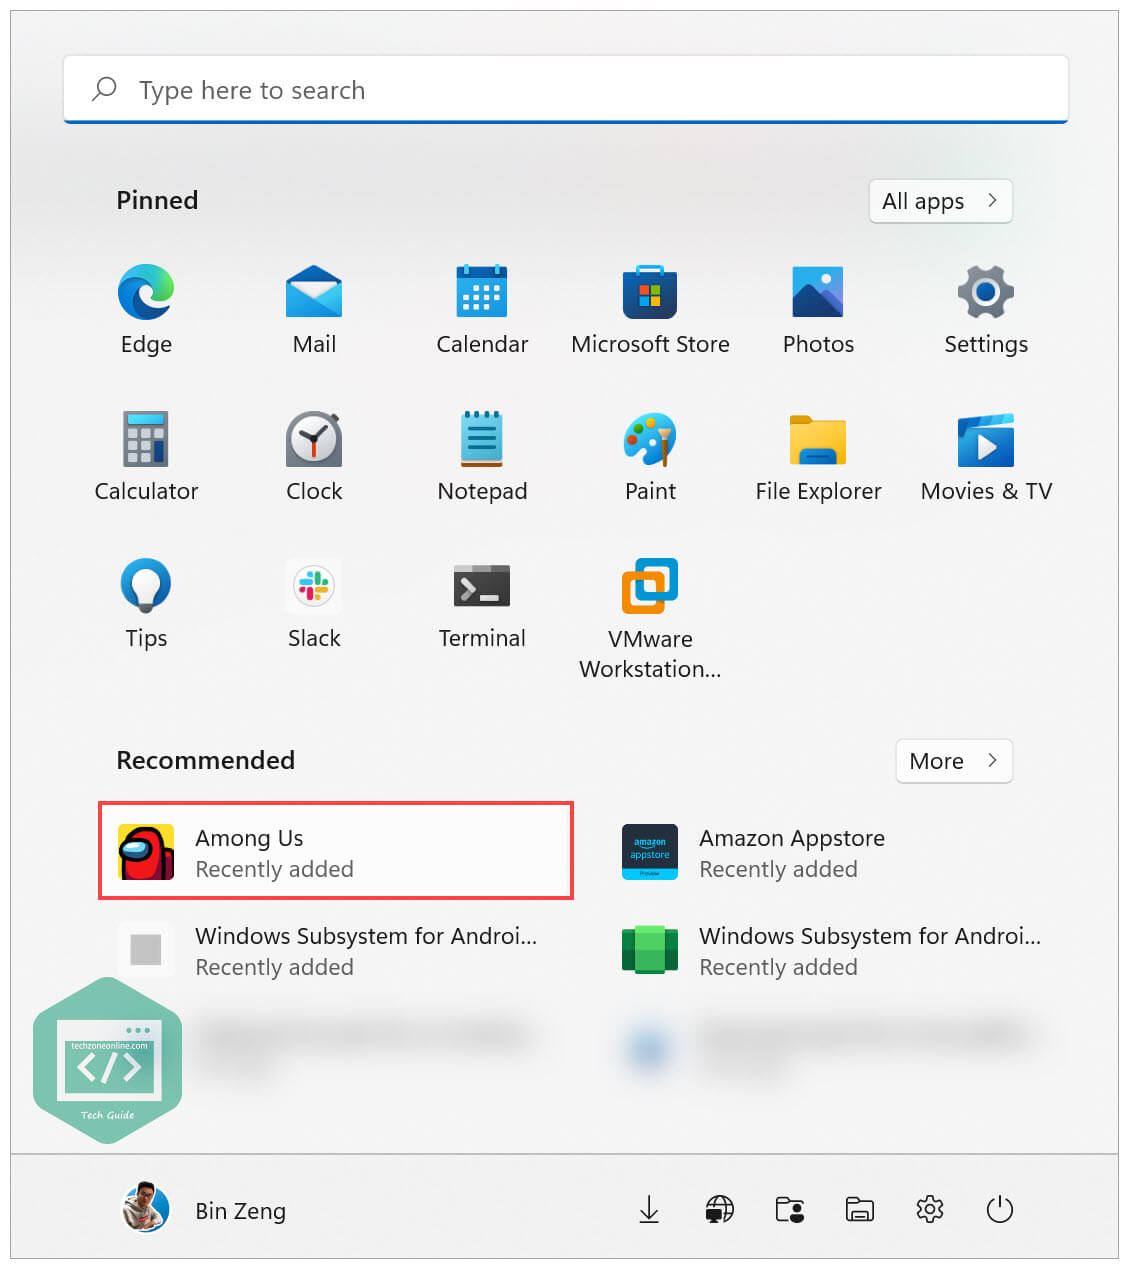
Wait a few seconds, and the .apk file will be successfully installed on your Windows 11 computer. - To launch the Android app you just installed, simply press the Windows logo key, and click on its icon.


That’s it! Now you’ve successfully sideloaded Android apps on your Windows 11 computer. Feel free to drop a line in the comment area below if you have any questions or suggestions on this topic. Thanks for reading!